Dealing with localization in Laravel
Laravel is one of the most famous frameworks in PHP. Taylor Otwell built it as one of the most popular open-source PHP development frameworks for quickly and easily creating customizable online web applications. Laravel is more advanced than the CodeIgniter framework and is built based on Symfony-based architectural patterns. Laravel is an MVC framework with bundles, migrations, and Artisan CLI. Developers like Laravel because it has many features and one of these features is localization.
How to Set Up a Multilingual Websites and Localization in Laravel
Installing Laravel
First of all, before installing Laravel, we need to prepare the environment by installing WAMP server or XAMPP server. After finishing the installation and ensuring that PHP and MYSQL are working fine, it’s time to install COMPOSER.
Let’s dig into Laravel. If you are using WAMP, open the terminal and go to the following path “path-to-folder-wamp\wamp64\www”. Alternatively, if you are using XAMPP, go to “path-to-folder-xampp\xampp\htdocs” and run this command: composer create-project –prefer-dist laravel/laravel:^7.0 your-project-name. After downloading Laravel project in the terminal, type “cd your-project-name” then run php artisan serve. After that, open your preferred browser and type https://localhost:8000.
Localization Setup
To perform localization in Laravel, we need to work with Strings. This is how Laravel handles the internationalization(i18n) of any site that is designed to deal with multiple languages.
So, all we need to do is store all Strings in a file in “resources\lang” directory.
Once Laravel is installed in your machine, your default language will be English; navigate to config directory and open file app.php. You will find ‘locale’ => ‘en’, this is the default app language.
Adding Multiple Languages
1- Navigate to “resources\lang” directory, by default, you will find a folder called en, create a new folder for your target language (example:es), then create a file called lang.php
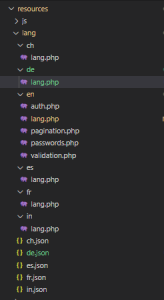
2-As we see from the above figure, we can set up as many languages as needed (es, de, fr, ar, in …etc.), each language must have a separate directory.

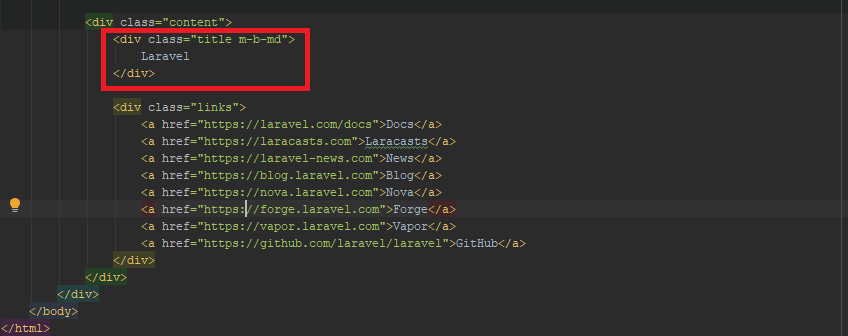
3-To get languages to work, we will navigate to welcome.blade.php in views subdirectory and replace HTML code in the illustrated figure with the below block of HTML code.
with

In Laravel, {{(‘filename.key’)}} is used to show the translations. We can also use inside php tags:

And in blade engine, we can use @lang directive to achieve the same result.
@lang(‘lang.title’)
4-Now let’s create url to handle locales, so we will navigate to routes directory and open web.php. Then we need to add routing:

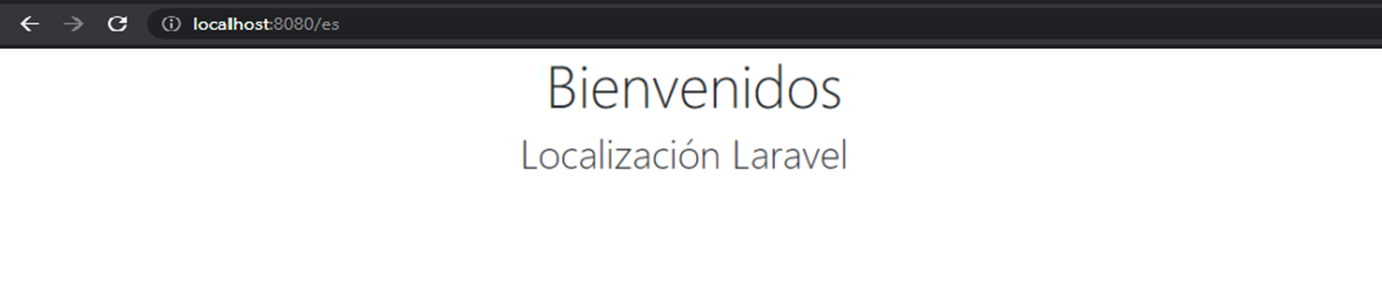
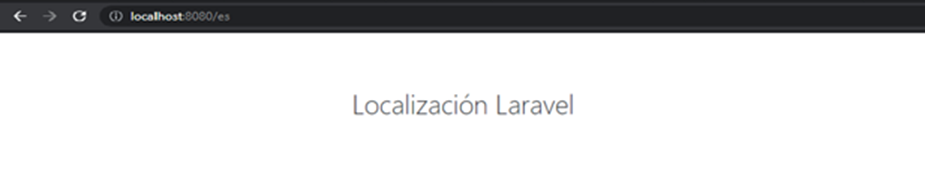
Finally, navigate to the browser and type https://localhost:8000/es
As a result, we used short keys as a reference point in prior procedures. Assume you are working on a project that requires a lot of translation when you must reference them in the views, employing short keys in such an application can be highly confusing. Laravel advises using the default translation as the key to avoiding this. And to accomplish this, you will need to build JSON files.
Let’s create JSON file for languages.
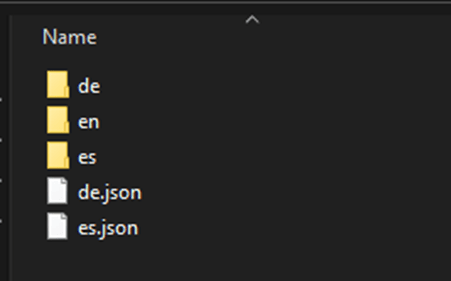
es.json file:

Let’s run again and the result will be the same.
Create a Language Switcher
So, what steps do we need to create a language switcher: let’s start step by step:
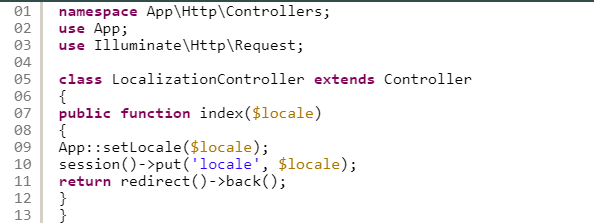
1-Create controller: we will call it LocalizationController in App/Http/Controllers. This controller will be used to record language in session and be able to retrieve it using the middleware that we create in the next step.
Command: php artisan make:controller LocalizationController type this command in terminal under project path
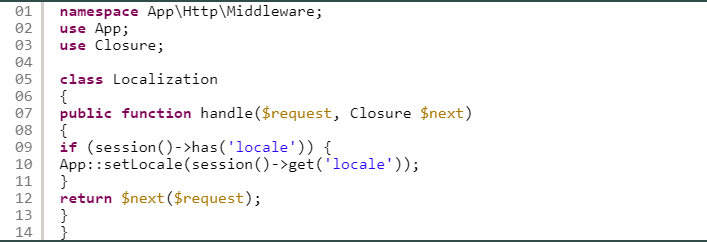
2-Create middleware that retrieves our current language from session
Command: php artisan make:middleware Localization type this command in terminal under project path
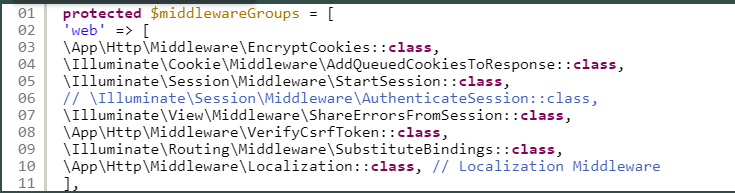
3-Assign middleware in kernel under app/http/Kernel.php
4-Finally create a root for this.
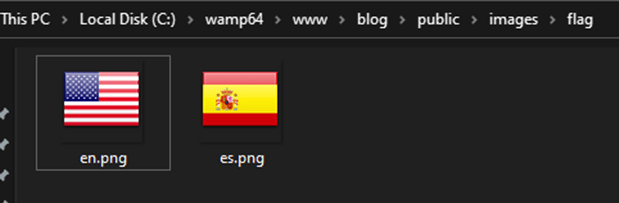
5-Wherever you save images, create a folder called flag and add images related to languages there.
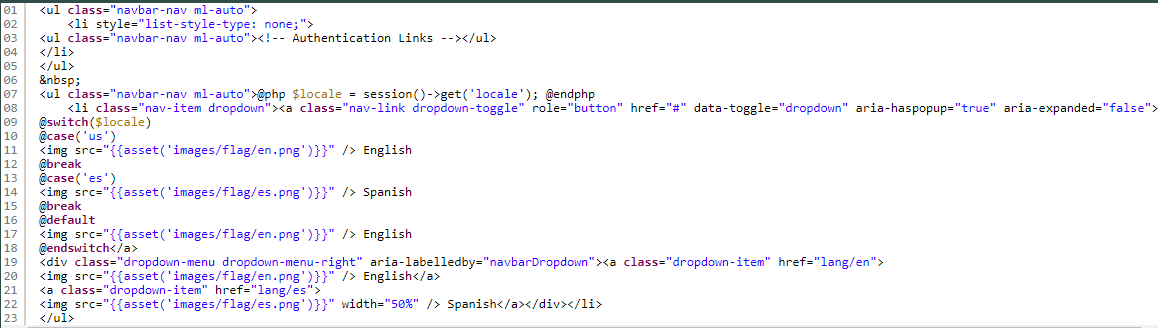
6-You can create a language switcher as shown below.
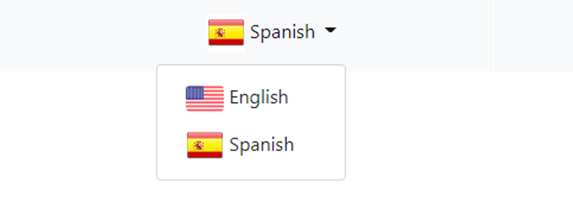
7-Finally, you will get a drop-down menu for languages.
Conclusion
Laravel can easily handle localization. Laravel allows you to construct multilingual applications. You may set up numerous languages in your application in a few different methods.