Tips for Umbraco Localization
Umbraco has introduced excellent features related to localization since version 8. These features enable users to build multilingual websites more easily and professionally. Even though these features streamline the localization process, it’s important to follow some steps to set up your website before beginning the process. In this blog post we’ll cover the steps you need to follow to prepare your Umbraco instance for localization.
Enable Target Languages
One of the initial steps consists of enabling the locales you want your content to be localized into. To do this, you need to follow the next steps:
-
- Login into your Umbraco panel.
- Click on Settings.
- Click on Languages.
- Click on Add language.

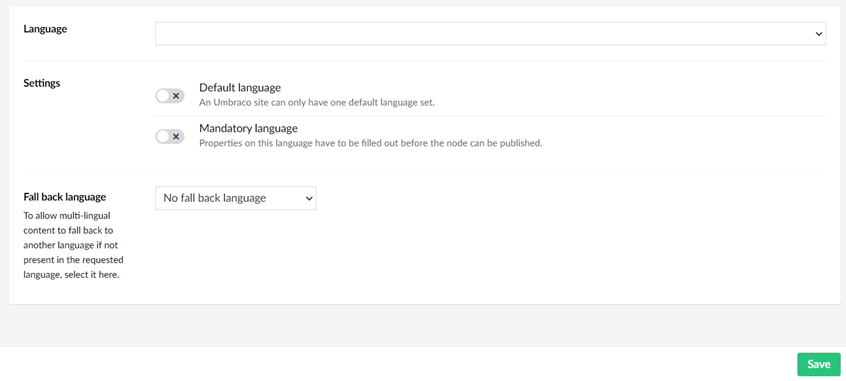
- After clicking on the Add language button, you will be redirected to the Add language Here you need to specify the following fields:
- Language: This is a dropdown with the list of locales accepted by Umbraco. You must select a locale from this dropdown.
- Default language: Here you can specify if the new locale will be the default locale for your site or not. The default locale will be the one displayed in case the website cannot infer any locale based on the user.
- Mandatory language: this determines if a language is mandatory before a node with content can be published.
- Fallback language: if any content is not present in the new locale, then it will default to the language specified here (if any).
- Once you are done populating these fields, click on Save to add the locale.
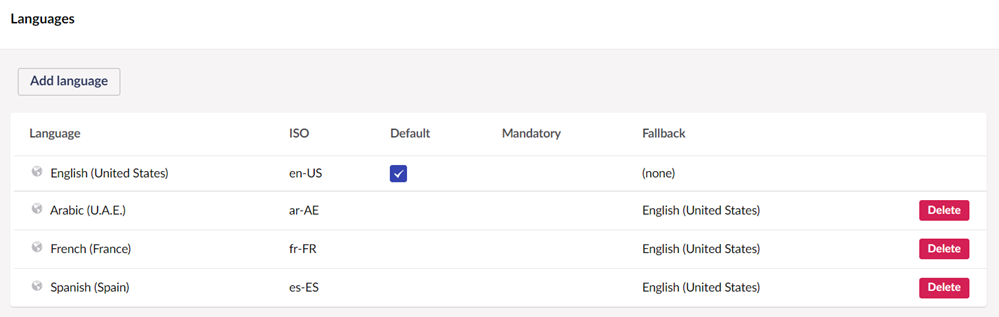
Additionally, you can delete a target locale by clicking on the Delete button:
Backoffice Localization
There are some cases in which Umbraco end users (for example, content editors) do not speak English. In this case, you can localize the back office user interface so that end users can use Umbraco in their native language. Then, on the account settings page, users can specify their language so the backoffice shows translated accordingly.
Currently, Umbraco supports several target languages. The translations for these languages are included in the Umbraco core. If you want to override Umbraco core translations or translations shipped with packages, you can do that by using the files located in the following path:
/config/lang/{language}.user.xml
These files are empty by default, but you can add any new keys you want or override existing ones with your own translations.
For these files to deploy when you do a dotnet publish, you need to add the following to your .csproj file:

If you are a package developer and you are interested in localizing your package content, please refer to Language file for packages document for further details.
Website Localization
If you need your website content localized, then it’s important to make sure their types are properly configured so they support localization. To do this, you need to follow the next steps:
- Login into your Umbraco panel.
- Click on Settings.
- Click on the Type you want to configure.
- Click on the Permissions
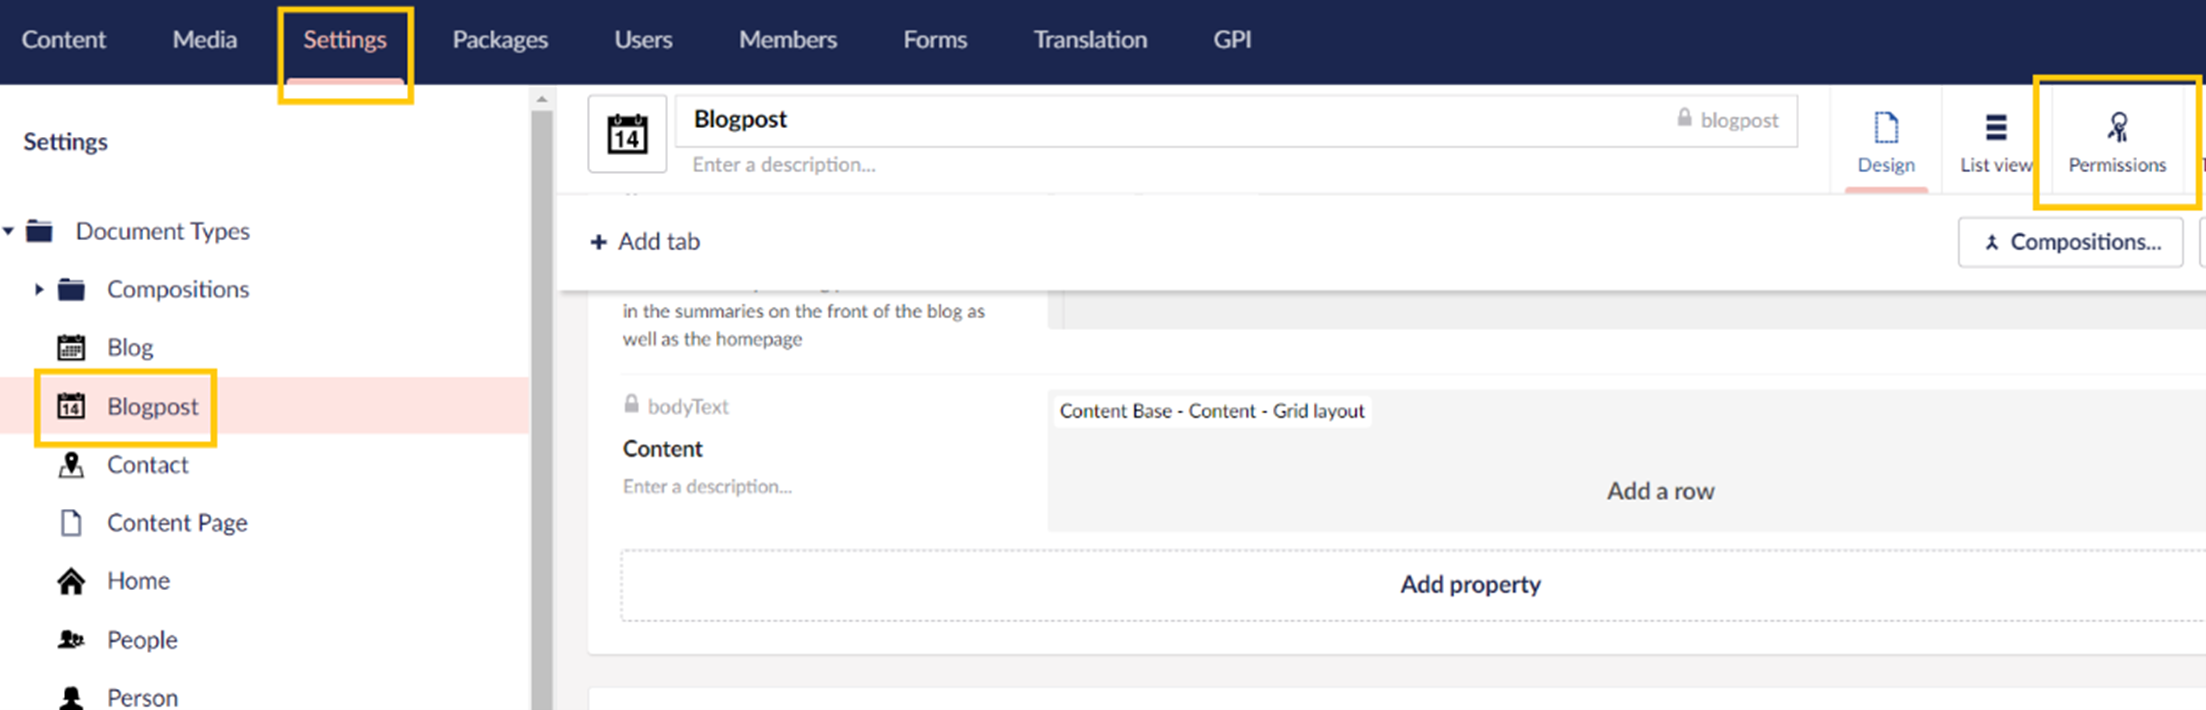
- This will redirect you to the Permissions page. On this page, make sure that the option Allow vary by culture is enabled.
- Finally, click on Save to confirm your changes.
Once you are done enabling localization on your content Type, then it’s important to review each field and make sure it allows localization as well. To do this, you need to follow the next steps:
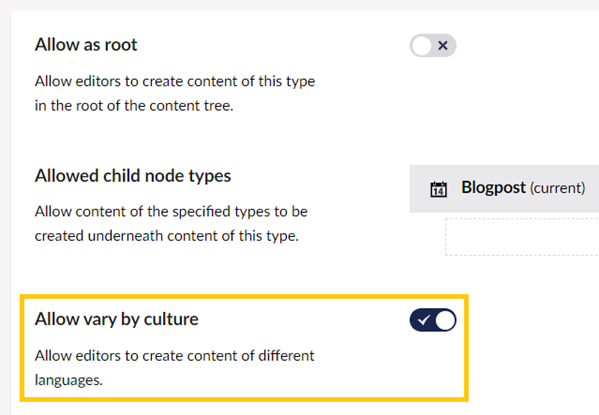
- Go to the Design section of your Type.
- Click on the Edit button (gear) on the field you want to configure.
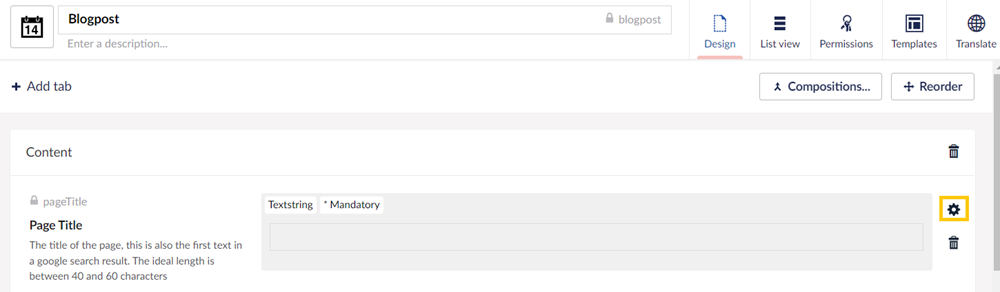
- This will show a popup on the left side. Scroll down to the bottom and make sure that the option Allow vary by culture is enabled.
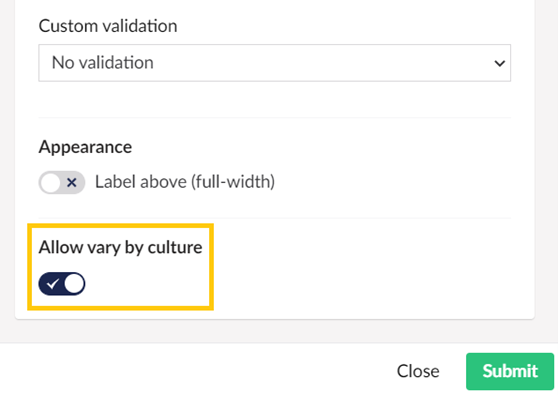
- Click on Submit.
- Once you are done checking and/or updating all the fields, click on Save to confirm your changes.
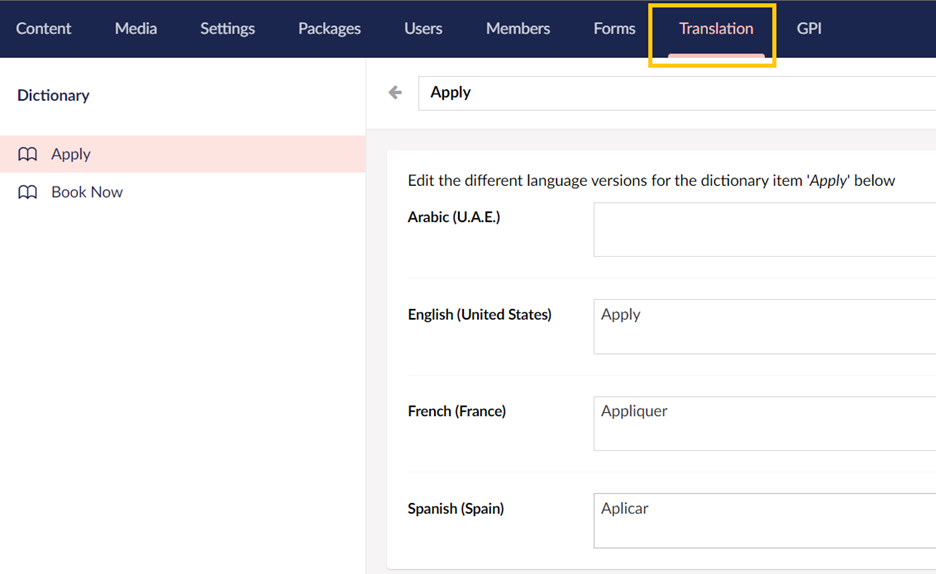
Dictionary
Since version 8, Umbraco introduced the concept of a dictionary. This feature allows you to add key-value pairs to your Umbraco instance and use them either in your website or your Backoffice. This option is available under the Translation section, and here you can specify the translation for each dictionary entry.
Conclusion
In this blog post, we covered the main steps needed to set up your Umbraco instance before starting any localization project. This platform has great support for localization and is a great option to consider when you are planning to build a website that needs to be built for a global audience.
References