New Features in Photoshop CC 2015
If you use Photoshop you know Adobe is always trying to improve their products by really listening to the users. As a result, the UI has gotten better and easier with each new upgrade.
In this blog, I will discuss using a few of the new features in Photoshop CC 2015: the Artboard feature, Glyph panel and Layers panel.
The Artboard Feature
One new feature in Photoshop CC 2015 is creating multiple PSDs using artboards. This feature lets you create several different layouts.
We all have different sizes of electronical devices, like iPhones, smart watches, tablets and desktops, and consumers expect to view the same image across all platforms. This feature will help you accomplish this.
Begin by opening Photoshop CC 2015. Go to File -> New -> Document Type: Artboard.
Artboard size: there are several options ranging from iPhone 6 Plus to MacBook Pro.
Scroll through the list to see the different custom sizes. Once you click on the artboard size, it automatically generates the width, height and resolution of viewing for your selected screen.
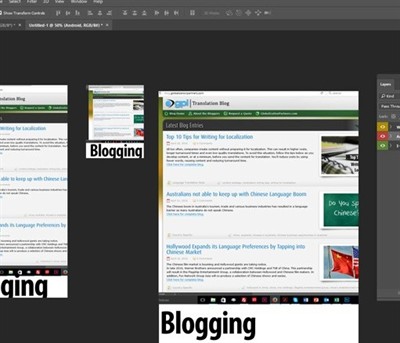
Now that you have your artboard up, you can click on that layer in the Layers panel for “Artboard 1” and plus signs will be added around your artboard.
Click the plus sign to add more artboards. Clicking in another layer (i.e “Artboard 2”) will give you a size option in the upper left-hand toolbar under the File menu. You can change your size there. You can also move them freely around on your screen.
In the Layers panel you can color code your artboard layers for easier viewing and change the names. Make sure you are clicked in the correct artboard layer to work in that layer. You can now scale your image to fit in each artboard. To get a more advanced tutorial and information on the artboard feature please go to Adobe’s site at: https://helpx.adobe.com/photoshop/how-to/design-with-artboards.html.
Glyph Panel
In the localization industry, glyphs come up a lot. If you are working with different currencies and metric systems you rely heavily on glyphs. In my work, I want the glyphs to be easily accessible and sometimes I struggle trying to find the correct glyph or the one I used previously. Before the Glyph panel, I would go into the computer character map and try to find the correct font that carries a particular glyph and copy and paste it in, which can be time consuming. That is why the new Glyph panel is one of my favorite features.
The Glyph panel in Photoshop CC 2015 now gives you options to use your most recently used glyphs and sort them for ease of use.
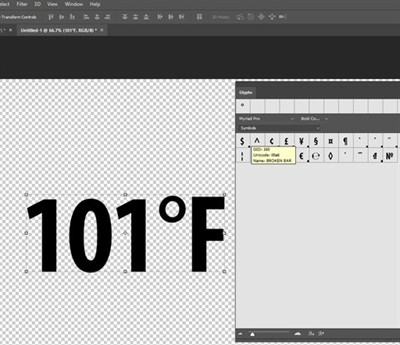
Open Photoshop and go to Windows -> Glyphs. The Glyph panel will open.
Double clicking on your glyph brings it up to the top toolbar for ease of use for next time. You can also sort by entire font, currency, numbers or math symbols. This makes it easier so you do not have to search through the entire font list to find a degree mark, for example. It also gives you the option on the upper right of the panel to clear recent glyphs if you would like to start fresh
Layers Panel
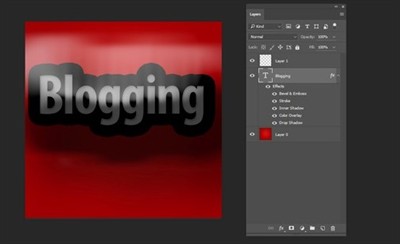
The last feature I will mention is the extensive Layers panel. We all love layers and all the fun you can have with embossing, drop shadows and strokes. Now you can add up to 10 instances of layering instead of grouping together. You can edit each layer on its own.
Open Photoshop CC 2015 and go into Windows -> Layers or simple use F7. As seen in the screenshot, many layers and effects were used to get the final outcome I was looking for. Having the option of many different layers is very convenient and allows me to continue creating my vision.
Conclusion
These new features in Photoshop CC 2015 help save time and are very convenient when working with this program. Adobe is always coming out with new features and updates so check back at https://www.adobe.com/products/photoshop/features.html to see what is new and what has been improved.