Localization with Episerver (Optimizely) CMS Part 2
Multilingual content in Episerver (Optimizely)
Episerver (Optimizely) handles multilingual content in a very transparent way. Each localized page is not a separate entity, but a new version of the default language page. Using that mechanism, Episerver (Optimizely) can display the page content tree under different languages and also identify which pages have not been translated yet under a certain language.
Also, for each page type, you can define which properties/fields will vary depending upon the language. Properties that are unique per language are editable in all languages. On the other hand, properties that are the same across all the languages can only be edited in the default language.
Exporting and importing content for translation
There’s no exporting/importing feature specifically designed for website localization shipped with Episerver (Optimizely), but there’s a module developed by one of their engineers that will facilitate this task. With that said, using Episerver (Optimizely) API it’s quite simple to implement this yourself. Here at GPI, we have created a piece of software (“connector”) that implements these features and connects to our Globalization Project Management Suite (GPMS), which enables a seamless connection to manage the localization process for a website.
Exporting content for translation
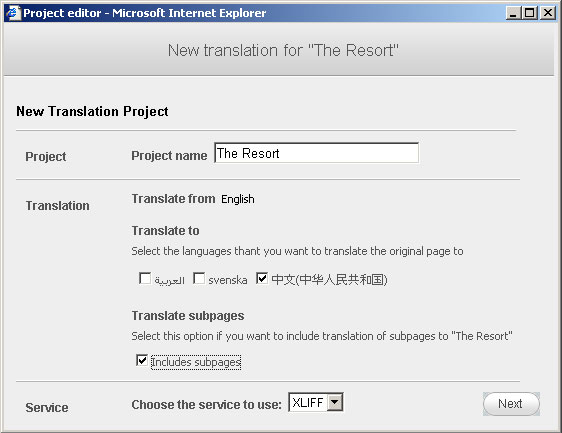
- When you are in Edit mode in Episerver (Optimizely), for each page/node you’ll have a “Translation tab” with a “New Project” button. Go to the top node of the section you want to export and click that button.
- Select the language(s) you want to translate and click “Include Subpages” if necessary.
- Click Next until the end of the wizard is reached and then close. There will be a new translation project created with the status “ReadyForSend“.
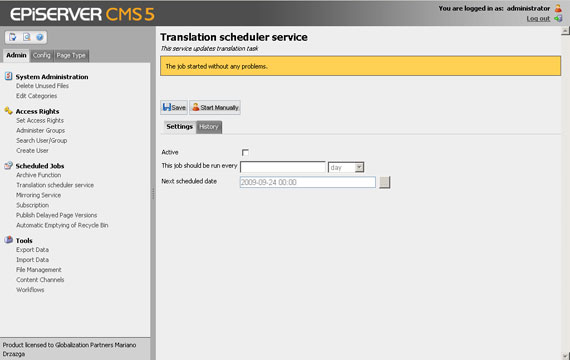
- Since TranslateX runs in a different thread to not compromise the site, there’s a “Translation Scheduler Service” option in Admin mode. The XLIFF files won’t be created until that service runs (you can either configure to run automatically or even easier, click on the “Start Manually” button. That will create the XLIFF files in the folder you selected and will change the status of the translation project to ReadForImport.
Import translated content

- Go to the node where you created the translation project, and click on “Translation tab”. Now the project will have an “Import” button that will launch the import wizard.
- Select the file to import and click Next.
- Select “New Version” and leave the other field empty. Click Next.
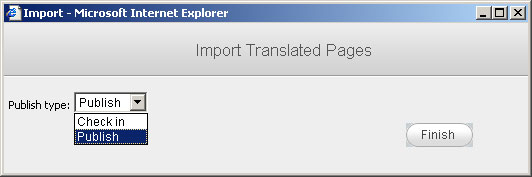
- Select the publish type that you need. In this case, you would select “Publish” so you can review the translated site by browsing it. Click “Finish” to finish this step.
- If you browse the content in the selected language, you will be able to see the localized pages. And if you check the pages in the browser, you’ll see that everything is pseudo-localized (everything that is stored in the Episerver (Optimizely) CMS).