Optimizely: How to Install the GPI Connector Using NuGet?
Authoring, launching and maintaining an Optimizely-based website in multiple languages can have its challenges if you don’t follow best practices. One of those best practices is to use GPI’s Translation Connector to streamline translation workflows.
Adding GPI NuGet Repository
GPI’s Translation Services Connector for Optimizely has been verified through Optimizely’s technology verification program. GPI’s Translation Services Connector passed strict design, quality, verification, compliance and support standards to ensure impeccable integrations for customers. You can install it from the Optimizely Nuget repository or by adding our GPI NuGet repository to the Nuget Package Manager from Visual Studio.
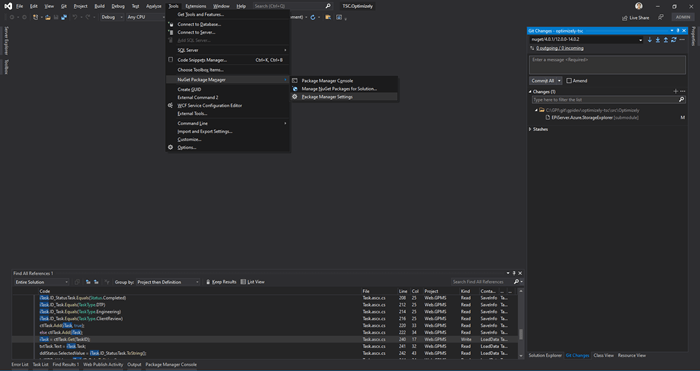
To add the NuGet repository, open Visual studio, and select Tools > NuGet Package Manager > Package Manager Settings, as shown in the image below:
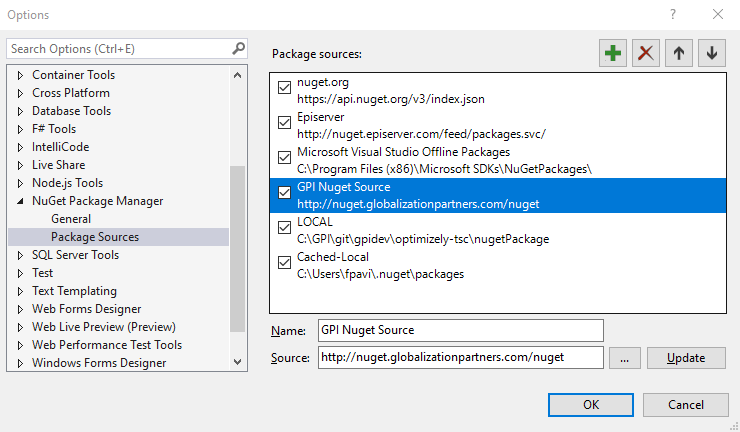
In the Options windows, select “Package Sources” from the left pane, and click on the button that has the green plus sign. Then enter “GPI Source” in the Name field, and “http://nuget.globalizationpartners.com/nuget” in the Source field, then click Update.
Installation
To get the GPI Translation Services Connector installed in your Optimizely instance, you need to follow these steps:
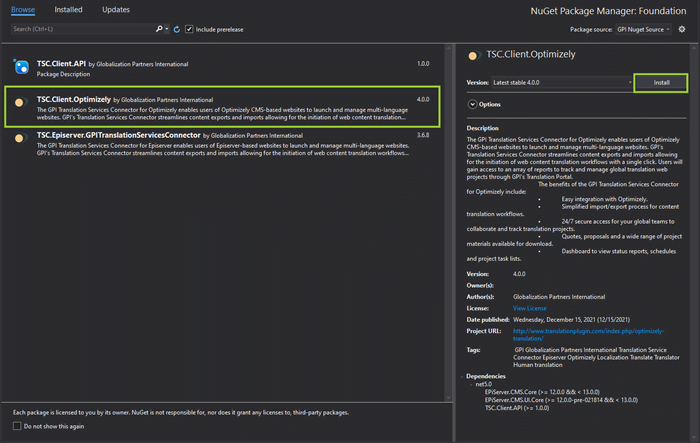
- In Visual Studio, open Package Administrator.
- Search for “TSC.Client.Optimizely”.
- Install by clicking on “Install”, as shown in the image below.
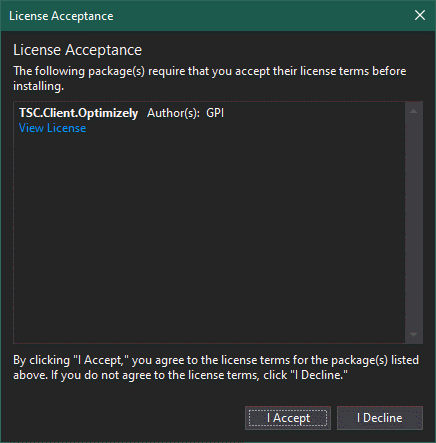
- Visual Studio will ask for confirmation. Click on OK.
For security reasons, there is one more step to set up the connector, but it should be done using the Optimizely Administration Panel.
To give permissions to users or user groups, follow these steps:
- Go to the Admin panel, switch to Config tab, and click on “Access Rights”. Then on the left pane, click “Permissions For Functions”. Look for “GPI_TSC_Administrators” under “GPI TSC Permissions” and click on the name.
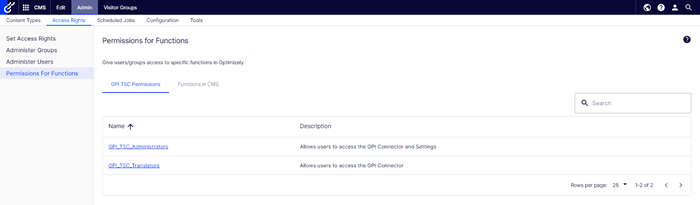
2. There you will see the users and groups that are granted this permission. If you are using the connector for the first time, the list will be empty, and no user will be able to use the connector. To assign permissions for users or user groups, click on “Add Users/Groups” as shown on the image below:
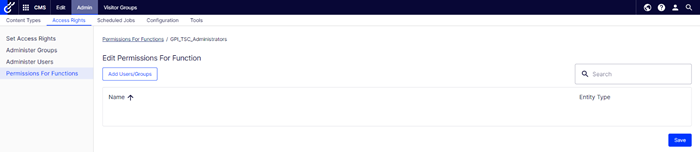
3. A pop-up will then be displayed. Look for users or groups to be allowed to use the connector by selecting the checkbox to the left of the user or group. All users and groups in this box will have GPI_TSC_Administrators permissions. Once all desired users and groups are selected, click Add Users/Groups.

You can repeat this step with the Translators permissions if you want to give any user or group access to the connector but restrict editing settings.
4. Once the popup is closed, check that all users and groups were properly added to the list, and click Save.

Once the security is set up, you can now open the connector from the Optimizely menu.
But, there is still one more step needed to start using the connector:
Connecting to our translation services server
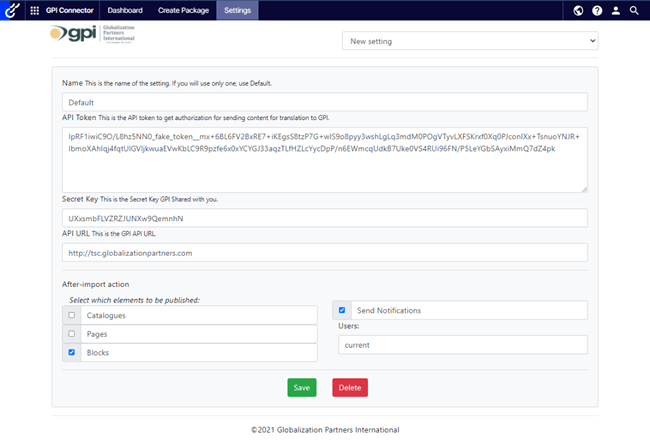
Now that you have the GPI Translation Services Connector installed, the next step will be to enter the authentication settings:
- Add the following Endpoint URL: https://tsc.globalizationpartners.com
- Enter the Authorization Token provided by GPI. If you don’t have one, please contact support@globalizationpartners.com.
- Check that the Publish setting is selected. You can check which elements will be published or uncheck to save the translated versions as a draft.
- Click the Save button.
5. You will then be redirected to the dashboard screen of the connector. If this is your first installation, you will see a screen like the one displayed below:
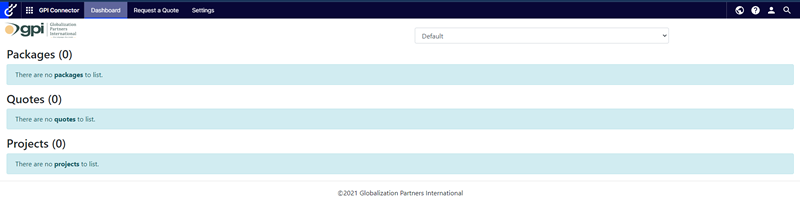
That’s all! Now you can start sending content for translation to GPI and import it directly back to your Optimizely site once the translation is ready.
For questions, further details, or request a demo visit Episerver (Optimizely) Translation Services Connector Overview, https://www.translationplugin.com/index.php/optimizely-translation/, or contact info@globalizationpartners.com.
You can also check our Connectors Library for other CMS’ or our Quick Quote Calculator!