How to Copy Content in Episerver (Optimizely)
Episerver (Optimizely) is a content management system (CMS) that allows users to easily manage website content and provides a user-friendly way to manage multiple websites in the same application. In this blog, I will discuss how Episerver (Optimizely) can reduce the time spent on editing websites and copying content if you use a page that is already created as a base for the addition of new content instead of creating a page from scratch.
Copying Content in Episerver (Optimizely)
There are two different ways to copy pages to another part of a website or even to another website.
Episerver (Optimizely) allows users to easily copy and paste directly from the tree view and, in an advanced way, export and import content from the admin panel.
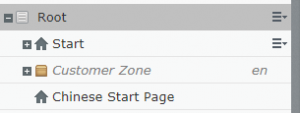
For demo purposes, we will use an instance of Episerver (Optimizely) with the Alloy demo website, which has several languages and a second website that is empty and only has the Chinese language available. All content translated has “_zh-Hans_” at the beginning.
Copying & Pasting
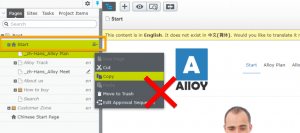
In the edit screen, go to the tree where the desired content to be copied is, set the mouse over the name of the page in the content tree and a three lined icon will appear. By clicking this icon, it will expand a menu with different options. Click copy.
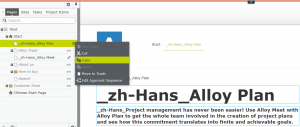
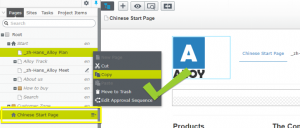
This process should be repeated for the destination item but click on the paste option. In this case, we want to reproduce the same website, and the destination will be the “Chinese Start Page”.

There is a disadvantage from following this approach when copying to another website because if the media is not copied properly in the destination, the page will not display the images correctly, as can be seen in the image below:
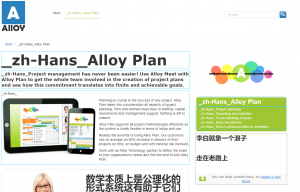
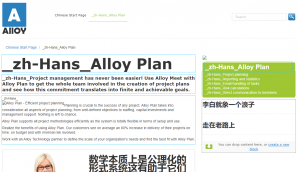
This is an issue that happens when the item is copied using the source website URL instead of the destination website URL to copy the content.
Exporting & Importing
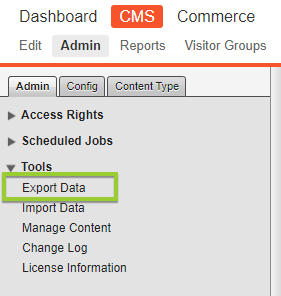
On the CMS admin page, in the left menu, there is an option for exporting and importing data under the tools section.
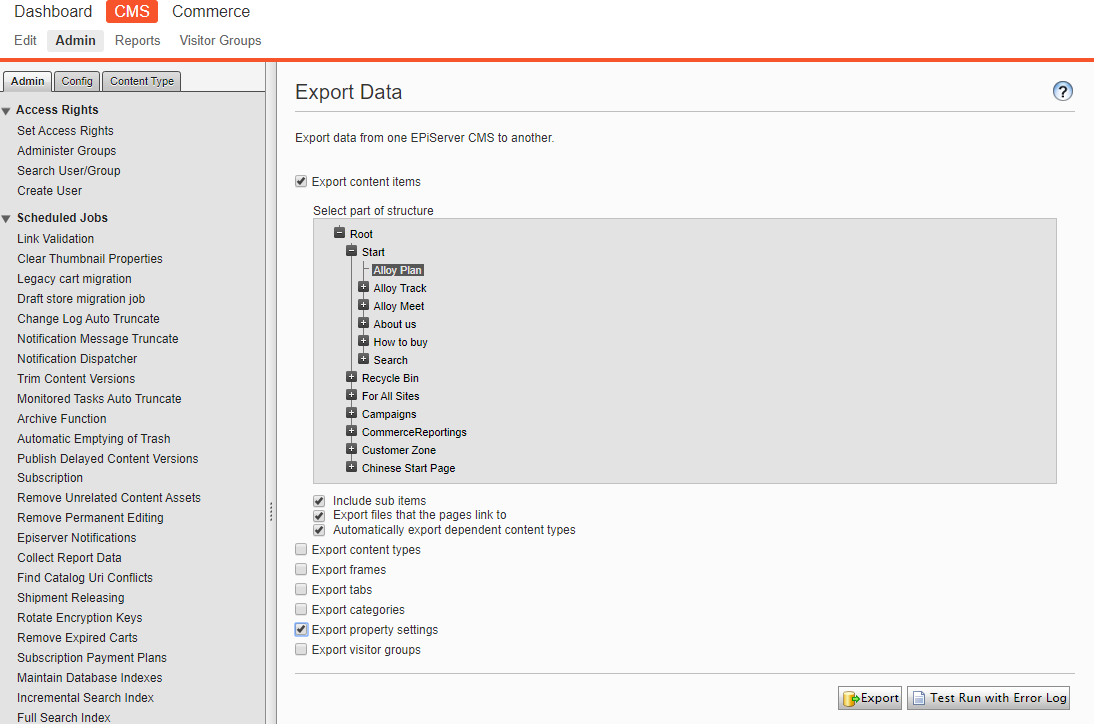
By clicking Export Data, Episerver (Optimizely) will show the exportation screen to the user and allow the selection of the desired content to be exported. In this example, the same page as the first example will be used. Be sure to check “Automatically export dependent content types” and “Export property settings”, to ensure the content will be able to be imported on the destination website.
Next, click the export button and a file will be downloaded.
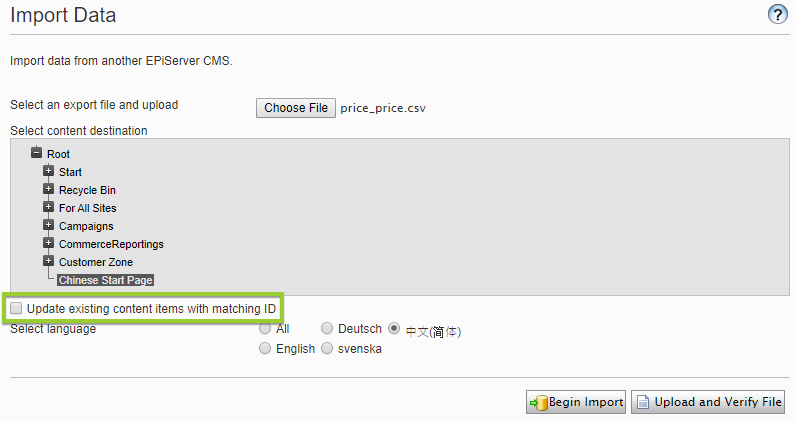
In the destination website, go to the Import Data area, select the downloaded file and select the content destination. Make sure to uncheck “Update existing content items with matching ID” otherwise, if the destination website is in the same instance that the destination is, the content will not be imported and will override the existing one that was recently exported.
When exporting and importing the content, you can select if want to import all languages or to import just one language.
This process will be easier for duplicating the content in another website than copying all properties one by one and will save you valuable time.