Working with Audio and Video in Articulate Storyline 360

eLearning plays an important role to enhance learners’ skills starting from the very basic to the most advanced one. To achieve the goal of any eLearning course, developers invest a lot of time to design and build a course that will engage the learner. In addition to the educational goals and scientific material for any eLearning course, visual and audio material play an important part in delivering educational goals.
The video and audio creation process can be very complicated and time consuming. Thanks to some authoring tools like Storyline, the process can be less complicated and affordable. In this article we will go through the audio and video features in Articulate Storyline 360.
Working with Audio
There are many ways to insert audio in Storyline.
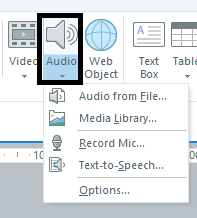
1. Import file from an existing audio file
This option enables you to insert any audio from your device to your timeline. Storyline supports .mp3, wav, wma, and many other audio extensions.
2. Import audio file from Media library
This is the same as the import from file. It enables the user to import from the media library of the current project or any previous projects.
3. Record from mic
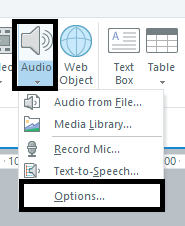
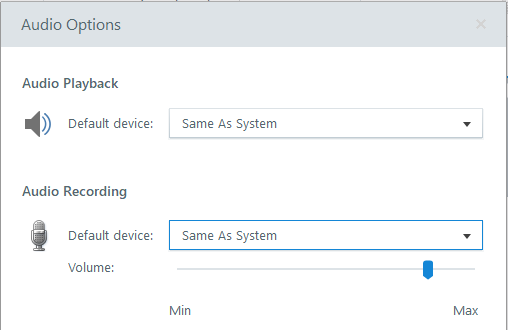
This option enables the user to record directly from his personal microphone. To do this you have to set the recording options to “Options”.
4. Text-to-Speech
This is a very distinguished feature because it can save a lot of money and effort. All you must do is to copy the text you need to convert to audio and choose the suitable language and voice type you want. The steps are as follows:
- Copy the text you want to convert to an audio
- Go to Audio > Text-to-Speech
- Copy the test to the window below

- Choose the language and voice gender
TIP: You can also choose to add Closed caption in the same step by checking the “Generate Closed Captions”.
- Click “OK”
Now you have an audio with subtitle generated in the same step. Below is the output of this step.
Working with Videos
Working with videos in storyline will not enable you to create advanced videos, but it can help you create simple videos.
There are many ways to insert video in Storyline.
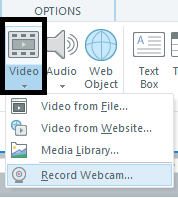
1. Import video from file
This option enables you to insert a video file from your device to your timeline.
2. Import video from Website
This option enables the user to embed video from popular video hosting websites like YouTube and Vimeo
3. Import video file from Media library
This is the same as import from file. It enables the user to import from media library of the current project or any previous projects.
4. Record a video from Webcam
You can record videos using your personal webcam following the below steps:
- Go to the Insert > Video > Record Webcam
- Make sure to adjust the device settings before you start.
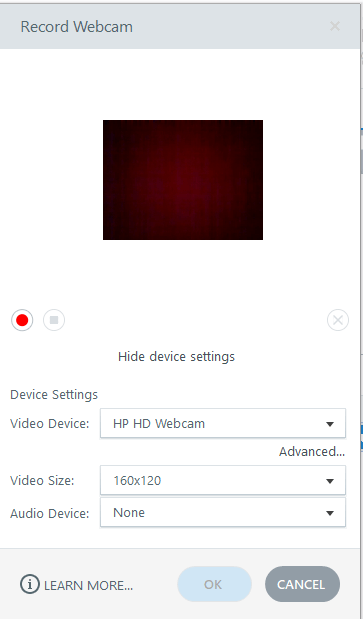
- Click the red Record button to begin recording
- When done, click the “Stop” button.
You can preview the output of the recording before inserting it to the timeline by clicking the Play button.
Tips for Dealing with Audio and Video in Storyline
Storyline has an audio editor that enables you to delete parts from the audio, control the volume by increasing or decreasing it and add silence where needed.

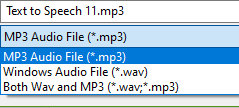
You can export audios from Storyline to mp3, wave, and both mp3 and wave at the same time.
You can choose a poster frame for your video by right clicking on the video frame and choose “Set Poster Frame”.

Recorded or imported videos can be controlled by the timeline and the video editor. Video editor enables you to trim, crop, adjust volume, add logo, and control the brightness and contrast of the video.

Videos imported from websites can’t be edited in the video editor. It also plays separately from the slide and can’t be controlled by the timeline.
Storyline is not a video and audio advanced producer, but it has the essentials that enable course developers to polish and enhance the quality of the final eLearning course.
