Working with Shapes and Tables in Articulate Storyline 360
The Storyline 360 Insert tab contains a variety of powerful features. In today’s article, I will go through two of these features — adding shapes and tables in Articulate Storyline 360.
Working with Shapes
Shapes play many different roles in Storyline. Shapes are used to build the design of a slide as drag-and-drop questions or they are inserted to function as buttons. . Let’s start with how to insert a shape.
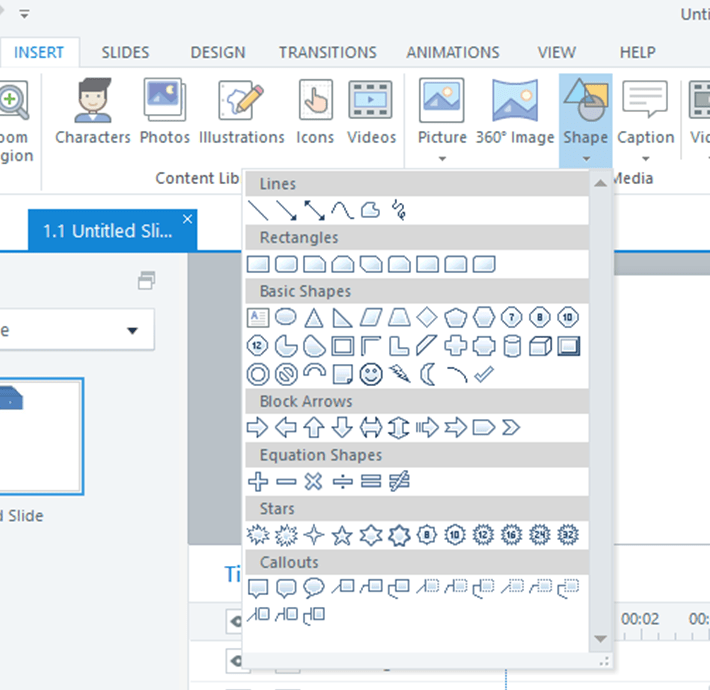
From the “Insert” tab choose “shape”. There are a wide variety of shapes that you can choose from depending on your design needs.
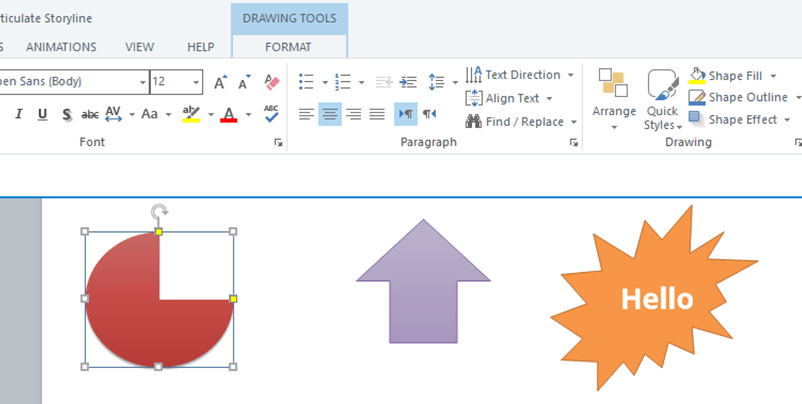
You can insert any shape you want then control it with the “Format” tab. This allows you to customize the color, fill, outline, size, group, etc.
You can add text to any shape through one of these two ways:
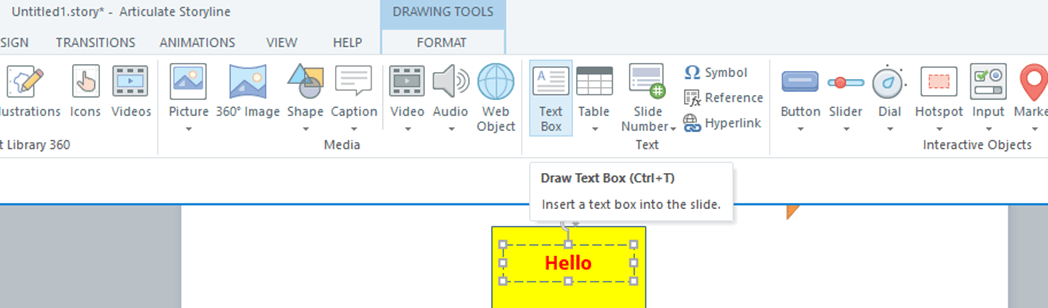
The first option is to, draw a text box from the “Format” tab.
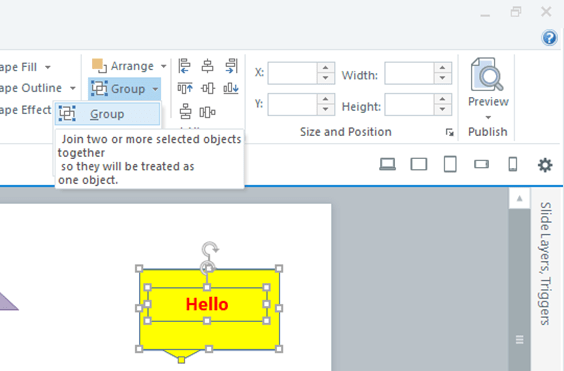
Tip: Don’t forget to group the shape with the text box by selecting both the text box and the shape then hit “Ctrl + G” or choose the “group” option from the “Format” tab:
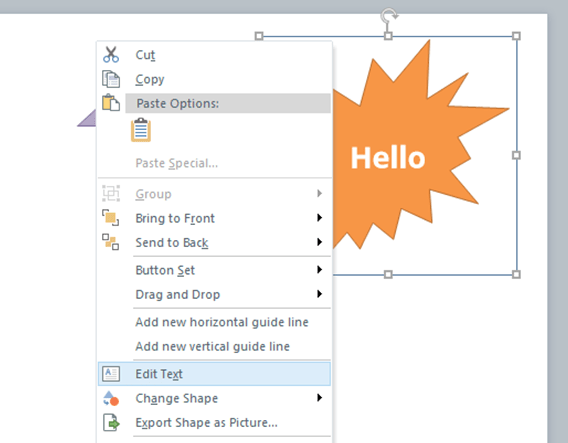
The second way to add text to a shape is to write directly in the shape. Select the shape, then right-click and choose “Edit Text”.
How Do You Convert Shapes to Buttons?
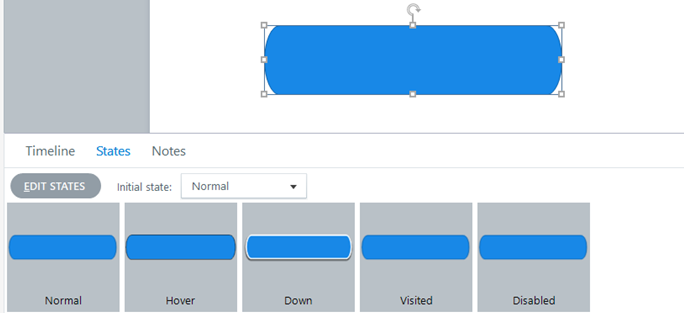
One powerful feature of shapes is that we can convert them to buttons. You can do so by adding different states and triggers to control how a button works. Typically, shapes have only one “Normal” state.

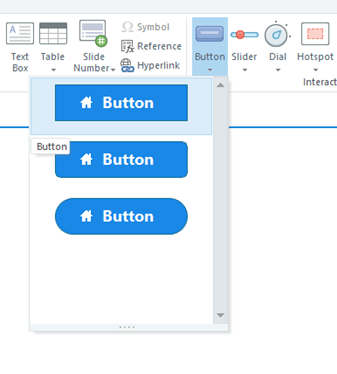
To convert a shape to a button, select the shape and go to Format > Button.
Now the “States” option for the button appears below
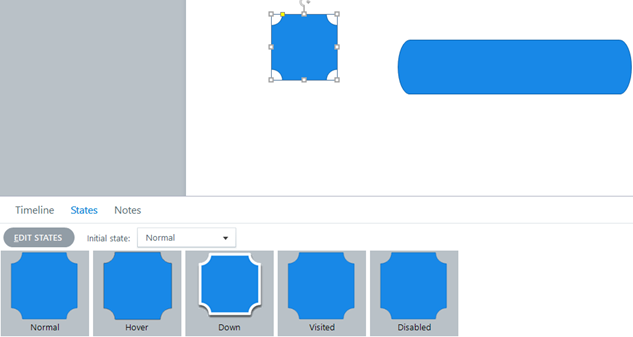
You can copy this formation to the shape by choosing “Format Painter” and then clicking on the shape. Now you can use the shape as a button.
Using Format Shape and Format Picture
If you want to change or edit any of the Shape information and format, you can Press “Ctrl + Enter” or select from the “Format” tab on the ribbon, then click the arrow in the lower right corner of the “Shape Styles” or “Picture Styles” group.
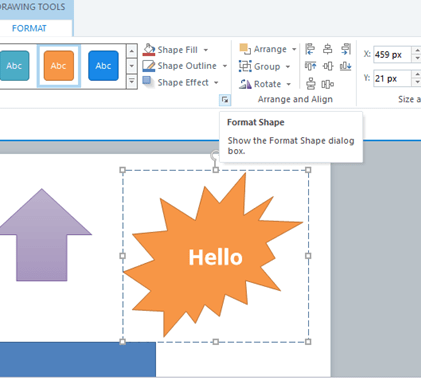
You can also use the tabs on the left side of the window to set your options.

Working With Tables
Tables are an important tool to organize data in an easy way. They also play an important role in making your data more accessible for all users.
Import Tables:
There are two options to import a table in Storyline:
– Import tables from a PowerPoint presentation with all the text and formatting, then edit them as you’d like.
– Copy and paste a table from any other tool like Excel. All you need to do is to select the table and copy (Ctrl + C) then paste it where you want it to appear. Formatting may be lost, but you always can edit the table content and format when needed.
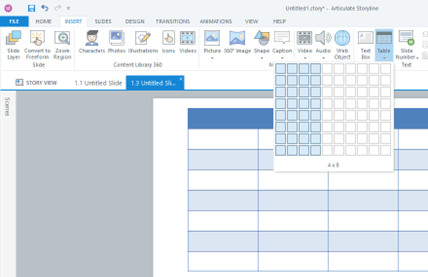
Creating Tables
You can always start a table from scratch. Select Insert > Table and select the number of rows and columns you want, then click your mouse to activate your choice.
The table will appear on the current slide. Then you can start building your table by adding data, rows, columns, and formatting.
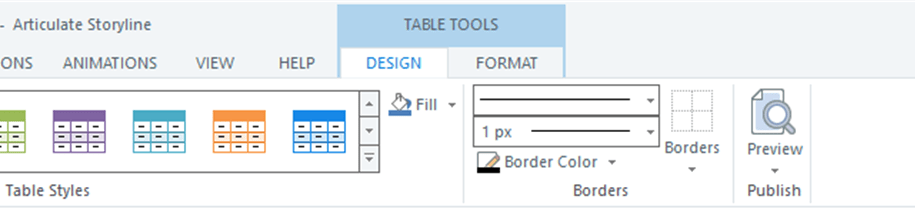
There are two options in the ribbon to control how the table looks. The “Design” tab controls the table design and the “Format” tab controls the text layout inside the table.
Shapes and tables in Articulate Storyline 360 can be used in many ways and levels. Aside from their original usage, both can be used as interactive elements to enrich your content design. Follow these easy steps and explore how you can make your product more engaging with shapes and tables.