Turning Text To Outlines Globally In InDesign
What Is Outline Text?
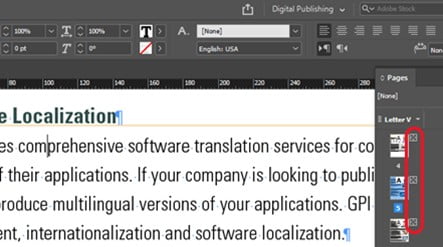
InDesign is a great application for designing a wide range of multilingual documentation. Designers and desktop publishers will always find themselves dealing with a range of image and text handling options to properly format translated documents. Outline text means turning text into a graphic image. Once the text has been converted, an actual font is no longer necessary for viewing and printing the document. This can be handy if your recipients don’t have various language fonts on their computers. This happens often with Japanese and Chinese translated documents headed to a printer based in the USA or UK. Outline content can be a solution to any font problems that arise when you send a file to an outside printer.
How To Outline Text?
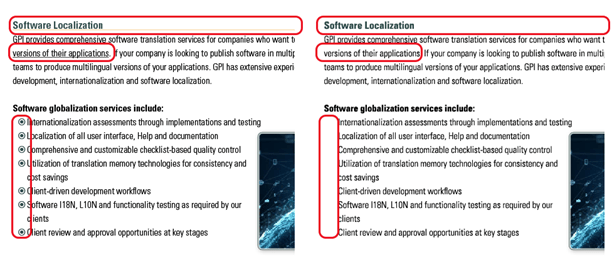
A great InDesign tip that allows multilingual desktop publishers and designers to convert a whole file into outlines is to use the regular outline option from the InDesign menu: Type > Create Outlines.
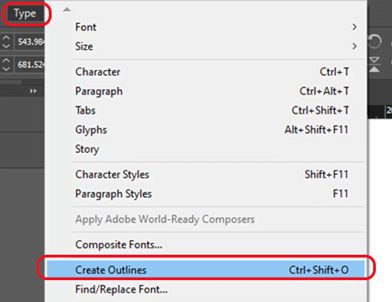
While this seems to work at first, you will notice a lot of problems if you do it this way. For example, in the image below, if we convert the text, it looks like it works. However, you will notice that:
- The yellow line was created with a rule below.
- The underline disappeared.
- The bullets created with automatic numbering disappeared.
The biggest problem is, what if you later need to go in and edit this. It is not text anymore, so there is no way to make any edits unless you keep another editable version and repeat the action every time you want to make an update.
Now, there is another process that can keep all the text editable and produce an outlined PDF at the same time.
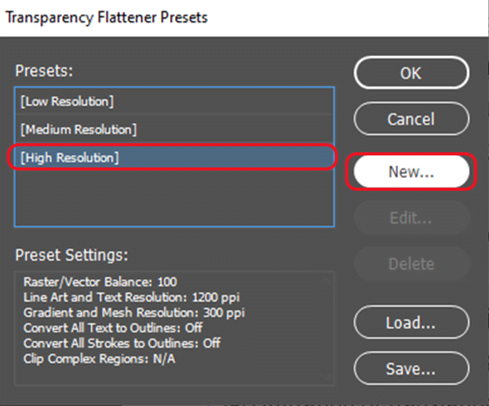
1. Go to the Edit > Transparency Flattener Presets.
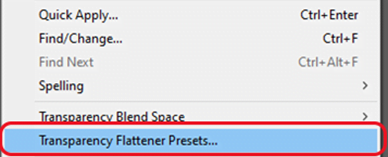
2. A pop-up window will appear. Click on the [High Resolution] preset and click “New”.
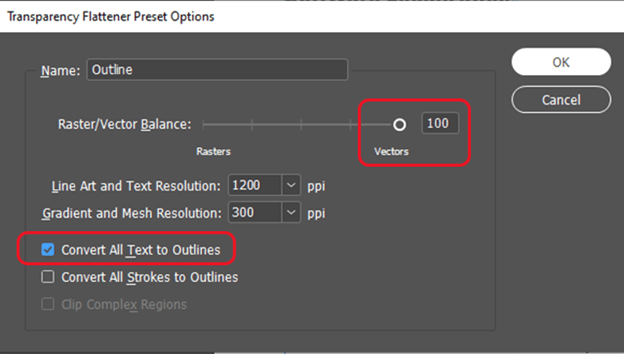
3. Give it a name called “outline” and make sure the “Raster/ Vector Balance” is to the right on vectors. Then turn on the “Convert all Text to Outlines” checkbox.
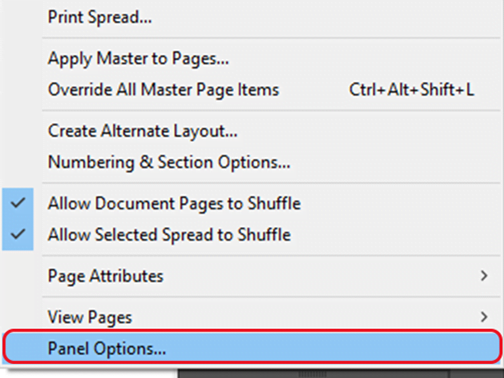
Make sure you have transparency in your document. It is important to have something transparent on every page. To check if you have transparency go to the “Pages” panel menu and choose Panel Options.
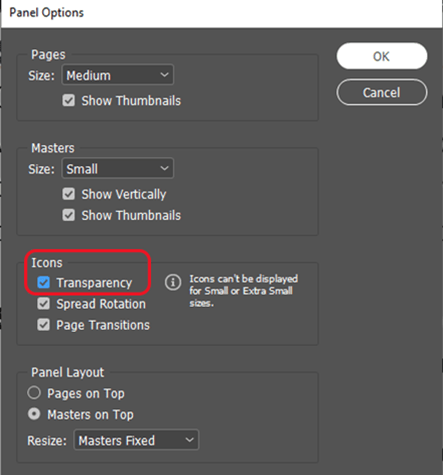
Turn on the “Transparency” checkbox click “OK”.
Now, you can see that there is transparency on this page
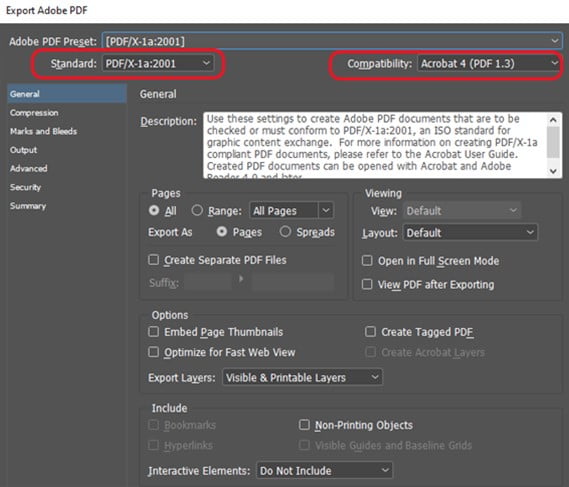
Go to the File > Export and then save this as a printable PDF.
Click “Save” and inside the export Adobe PDF dialog box choose “PDF x1a”. If you have some other preset that you usually use, you could choose it there, but the main thing is you want to make sure that the compatibility is set to Acrobat 4, not 5 or higher.
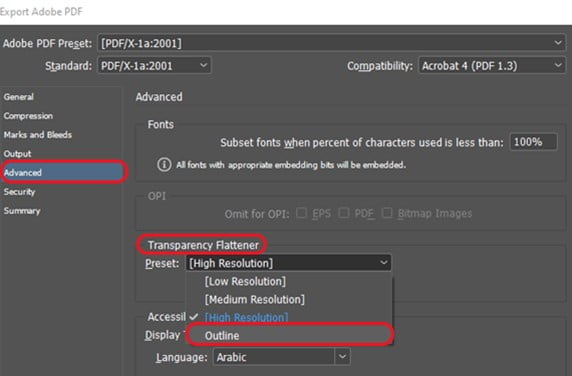
Go to the “Advanced” Tab and choose “Outline” from the preset’s popup menu.
Click “Export” to create the PDF.
When it is done, open it in Acrobat and you can see that everything looks just the way it did in InDesign.
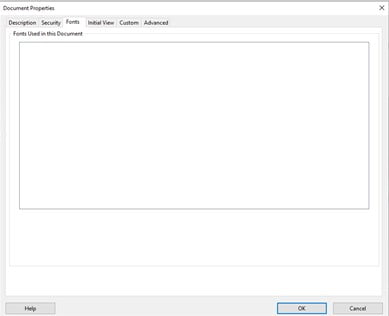
But what about the fonts? Are they still fonts? Well, there is only one way to be sure. In Acrobat, go to the File > Properties, the document properties dialog box will open. Click on the “Fonts” tab. This option shows exactly what fonts have been used in this PDF and as you can see on the screen below no fonts appear at all, which means that everything has been converted to outlines.
Conclusion
The above tip is extremely useful and will enable you to get the benefits of having an outlined layout and keep your original text in an editable format without losing any of the text features.
Editing any text that has been converted to outline can be resized, colorized, and printed, however, because the type is no longer a font, after conversion, it is impossible to edit the text itself.