Adding Interactive Elements in InDesign
PDFs are mostly used to send information to audiences so they can view a document under any platform scenario. In addition, PDFs can serve as a great collaboration and communication format allowing people a way to communicate back to you. Whether it’s to give you feedback in a survey or to submit information for a subscription, you need a way to organize information for people to send it to you, and this is the perfect job for a PDF form.
There are many applications you can use to design and create PDF forms. You can design a form in Microsoft Word, Illustrator, Photoshop or even you can make a form entirely in Adobe Acrobat. If you want to keep all the work in one application that provides you some great design tools as well as the ability to add form fields, you can use InDesign. With InDesign, you can create any page layout you want, and then add the form fields on top of that, using the Buttons and Forms panel.
What You Can Do in InDesign
You can add text fields, lists and combo boxes, checkboxes, radio buttons, even digital signature fields. You can then set properties on the form field to control the size of text, to make them required for submission, and to make them printable or not, and more. However, InDesign is not a fully-featured form solution. In some cases and in order to finish your form, you will have to take the PDF you exported from InDesign, and make some edits and adjustments in Acrobat. But having the form tools in InDesign makes it super easy to build 100% of your forms in InDesign or in some cases at least 90%. In addition, you can avoid completing the same steps over and over each time you make a change in your layout.
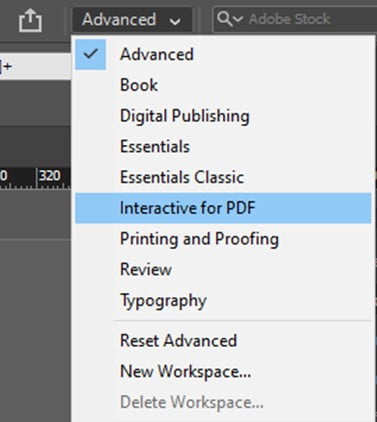
When you start creating an interactive document you can use the “Interactive for PDF” workspace. This will show most of all the panels for adding interactivity:
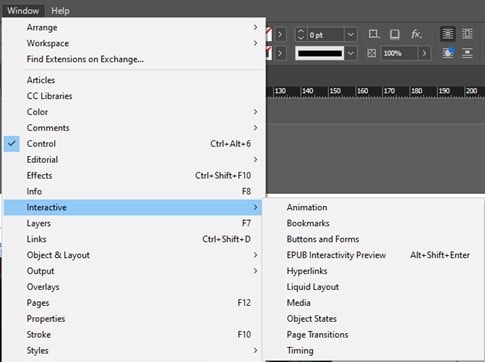
Or from the “Interactive” panel:
Creating Forms
Building a form in PDF from scratch would be a headache and takes a lot of time and effort. Using the Forms panel in InDesign will save you a lot of time.
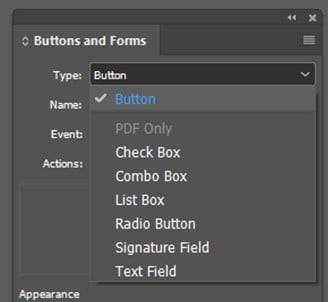
First, draw a box and from the “Buttons and Forms” Panel and assign the type of the field.
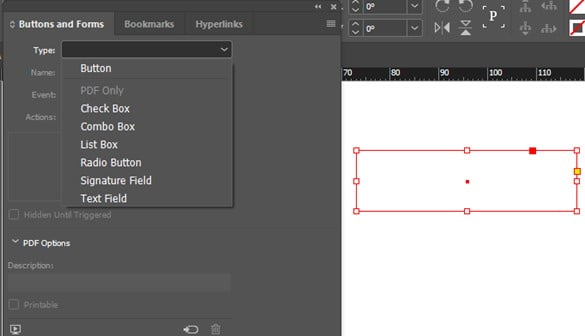
Every one of the above options has another set of options that will appear once you choose it. For example, if you picked the Text Field, you will see the below:
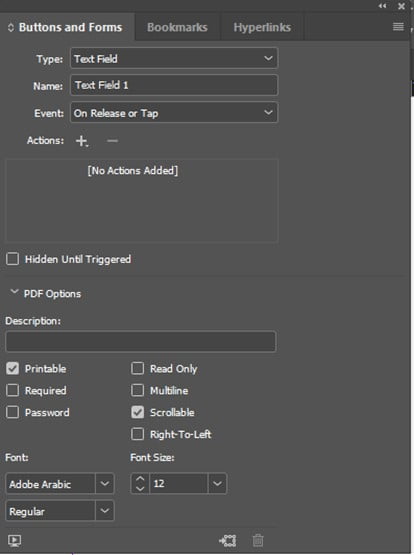
There are many options to choose from and to customize every field according to the needs.
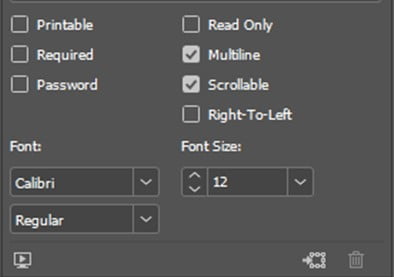
Some global guides to take care of while handling forms:
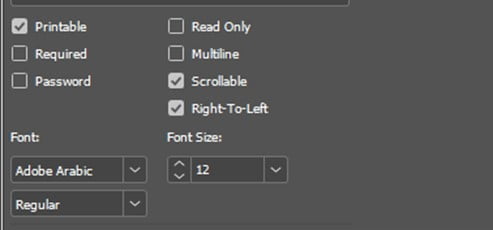
- Assign a name to the field
- Use suitable font type and size according to each language needs
- If you are building form to any RTL language, be careful to assign the right to left direction to
Creating Buttons
A button can be used to navigate to different pages or specific content on a page, it can play movies, sounds, and animations, and it can even show and hide buttons, including itself.
To create a button, Select “Type” tool then create a frame. At the top of the panel, there’s a “Type” menu, where we can choose a regular Button.
By selecting Button, there’s a field where you can name a button. Names are very important for buttons because you almost never create just one button in a document, so in order to know which button is which, you need to have some descriptive names.
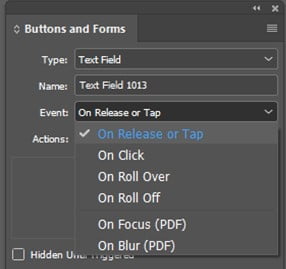
Below that, there’s an Event menu, where you can choose which triggering event will make something happen, so we have On Release or Tap, On Click, On Roll Over, On Roll Off, and On Focus and Blur for PDF.
Beneath this we have Actions. Actions are what will happen when the trigger event occurs. Buttons don’t have to have Actions, but if you intend for people to interact with a button by clicking on it or mousing over it, then you have to have an Action.
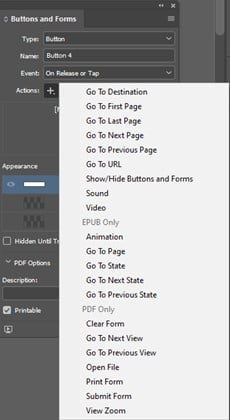
Clicking this plus sign, and choosing an action, is a cool shortcut for creating a button. You can also have a button hidden. And that way it will only appear when you want it. This can be very useful.
It is also important to assign the font type and size for each field. Also, consider the language specific needs. For Example, if the language is Chinese, Japanese, Arabic, or Hindi then make sure to select the suitable font type that supports these languages.
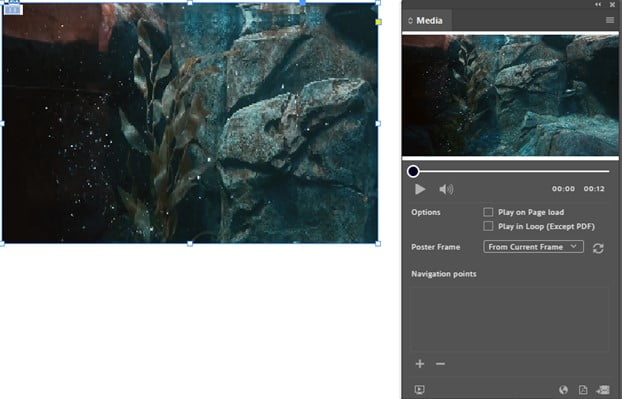
Media Interactive
This is pretty simple. All you have to do is to choose a video or an audio file.
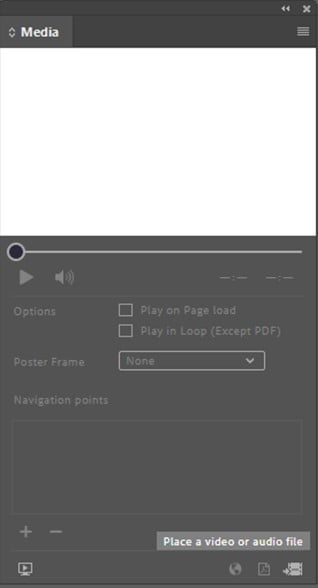
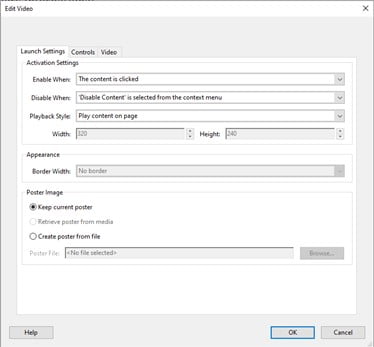
This panel does not have a lot of options like show the Play button or Volume you can control this after printing the file in Adobe Acrobat from “Media Rich” tool
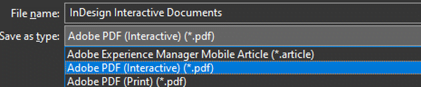
To create the PDF from InDesign. File > Export and choose Adobe PDF (Interactive)
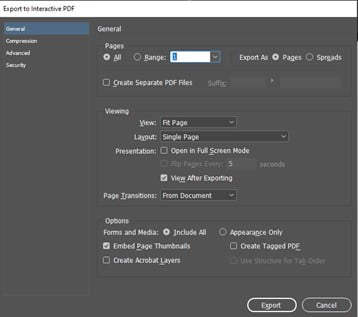
A pop-up window will open with all the options needed to print interactive PDF
Conclusion
Forms can be a hassle, but with InDesign, you can produce clean, easy-to-navigate PDFs with a few simple tweaks. InDesign Interactive options make the process easier.