Tips for Salsify Localization
Salsify is a product experience management platform. This platform provides a product content management and digital assets management (DAM) tool that helps users customize product pages and drive sales.
In this blog, we will focus on the localization aspects of Salsify. We will cover the available features and recommended practices related to localization. If you are planning to use or are using Salsify and you want your product experience to go global, I recommend you read this blog!
Enabling Locales
The first step is to enable all the locales you want your content to be localized into. To do this, you have to follow the next steps:
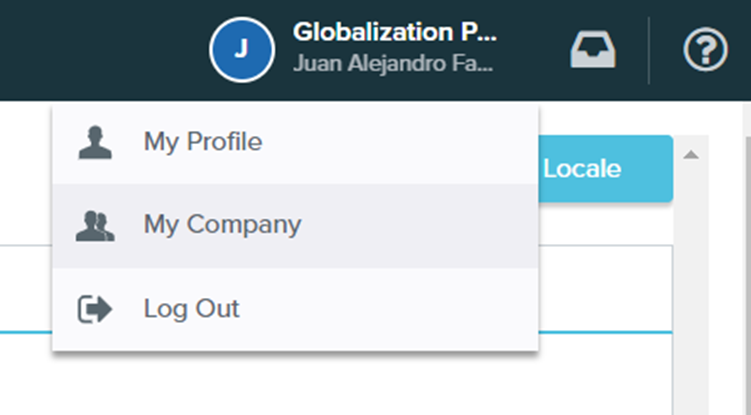
- Go to My Company.
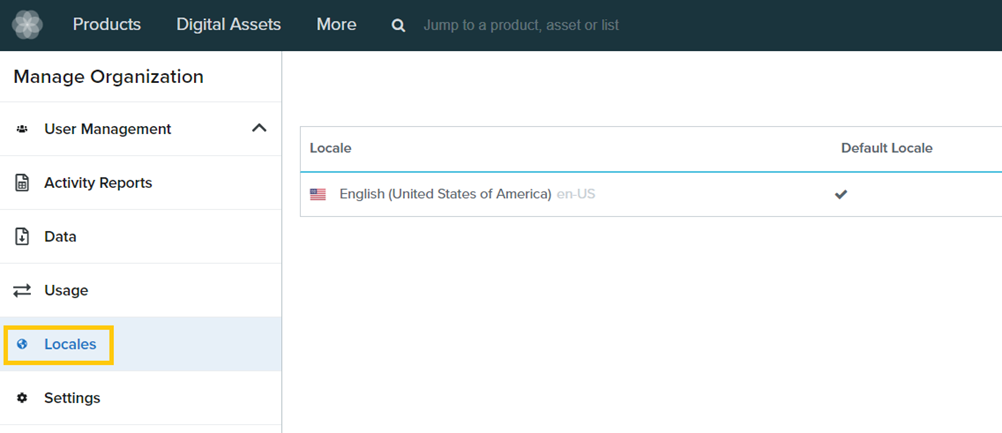
- In the left sidebar, click on Locales. This will show you the list of locales you have currently enabled and will allow you to add new locales.
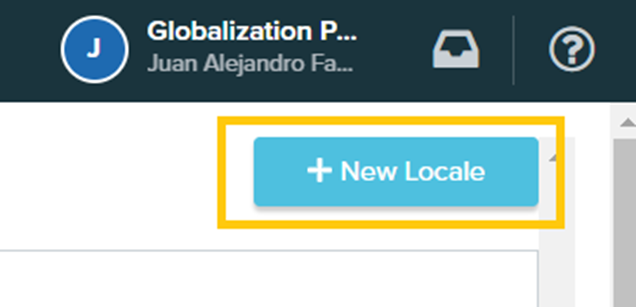
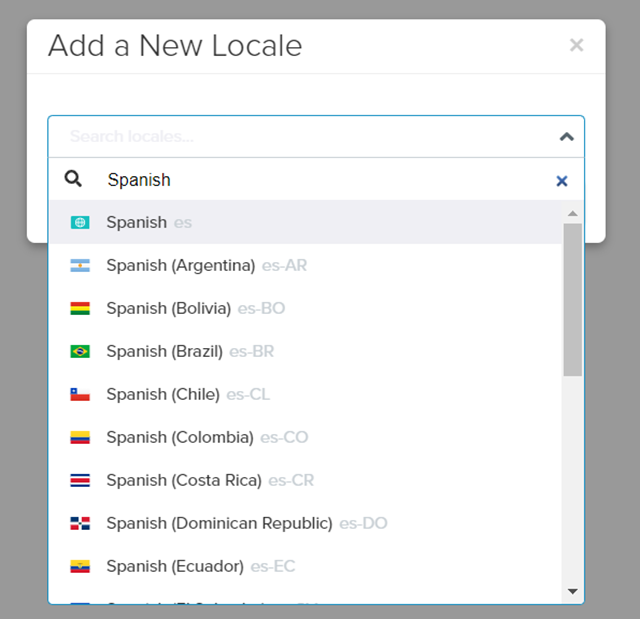
- Click on the New Locale.
- This will show you a popup like the following:
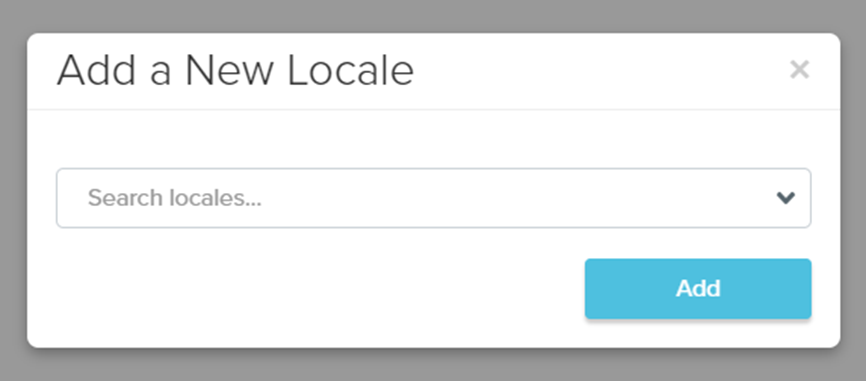
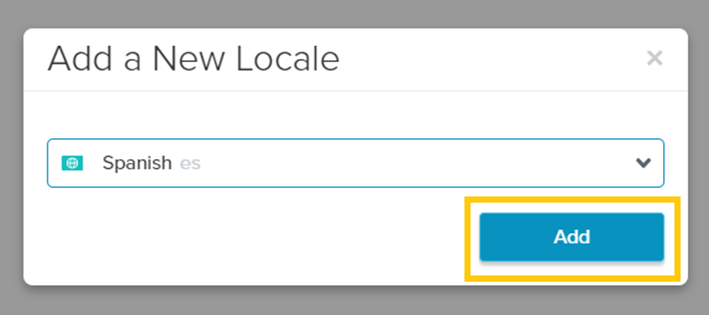
- Type the name of the locale you want to add and then select it.
- Finally, click on Add.
Currently, Salsify supports an extensive list of more than 150 locales, but if you need a locale that is not listed, you can contact Support. If you have access to the knowledge base, the complete list of locales is available here: Explore Salsify’s Supported Locales.
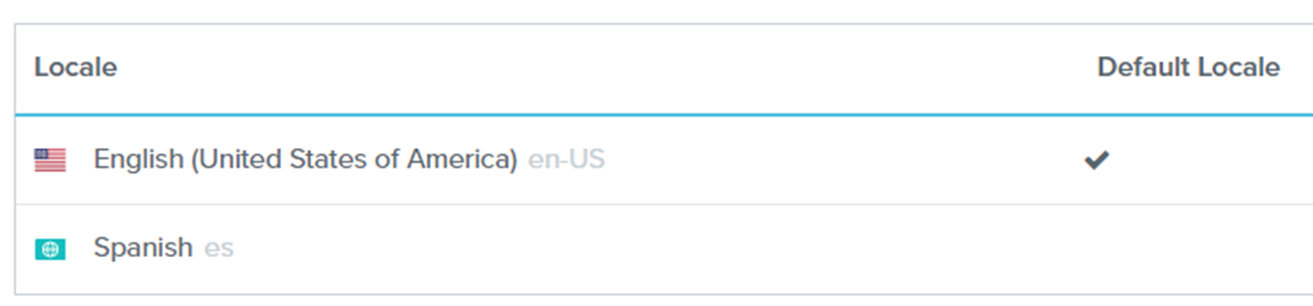
- This will add the selected locale to the list.
Localized Properties
A localized property stores specific content for each locale, while a non-localized property stores the same content for all the locales. For example, you can have products that have a description and an SKU (stock-keeping unit). The description is an example of a property that can be marked as localized, as it makes sense to translate it into each locale. On the other hand, the SKU is a global identifier for a product, so it makes sense to mark it as a non-localized property, as it might not change per locale.
For example, let’s assume that we have products and we want to mark the description property as localized. To do this, you have to follow the next steps:
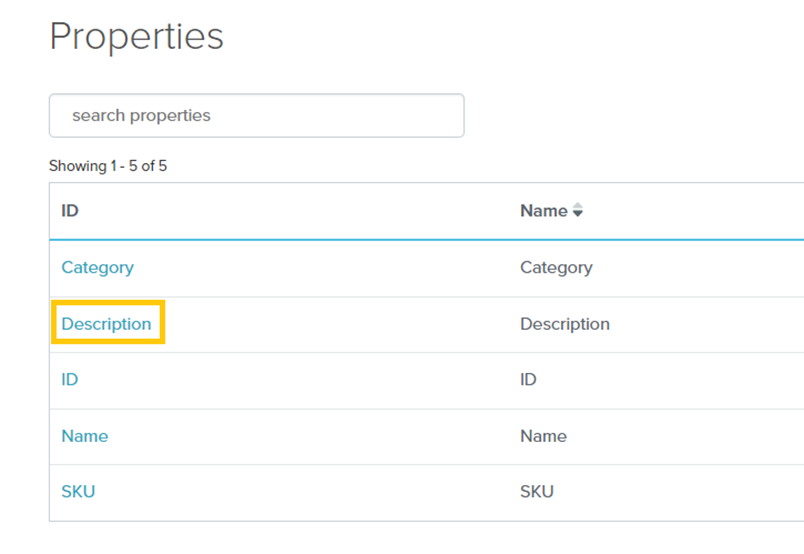
- Click on More > Properties.
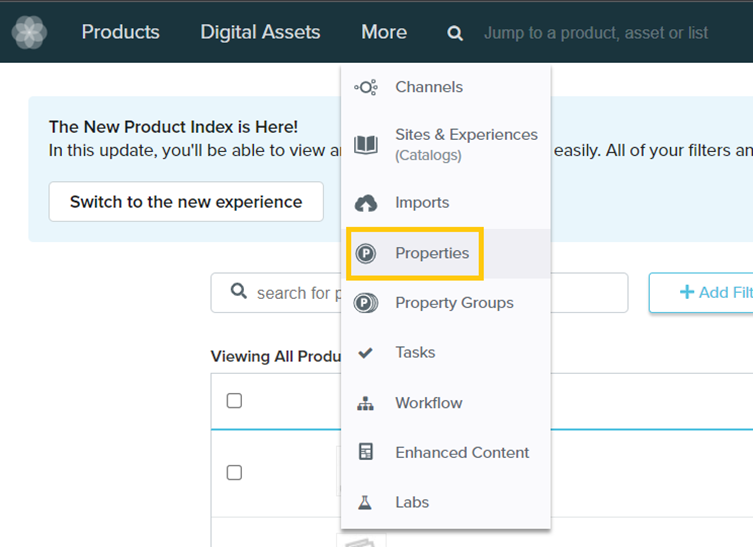
- This will show you the list of properties you have already created. Click on the property you want to mark as localized. Following this example, I will click on the Description property.
- Under the Property Configuration section, go to the Localizable setting and click on the pencil next to it. Change the value from No to Yes.
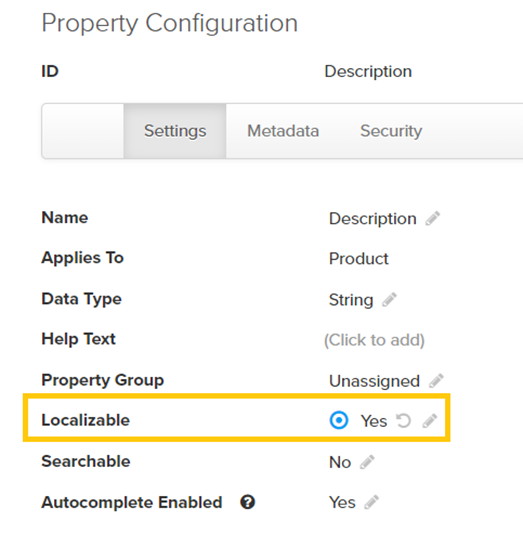
- Click on the Save.
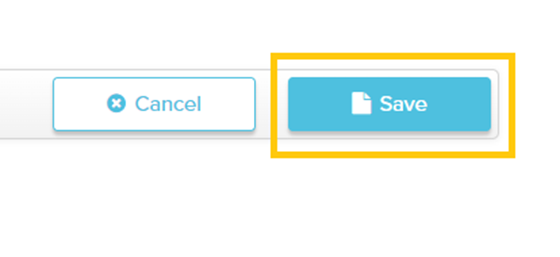
- Then, the platform will show you a warning message, alerting you that this operation cannot be reversed. If you are ok with this, click on Yes, Convert.

Now you should be able to access your products and add specific content for the Description field for each locale.
Localized Picklist Properties
Similar to regular localized fields, you can localize the different values of your picklist properties. To do this, you have to follow the next steps:
- Click on More > Properties.

- Click on the Picklist property whose values you want to localize.
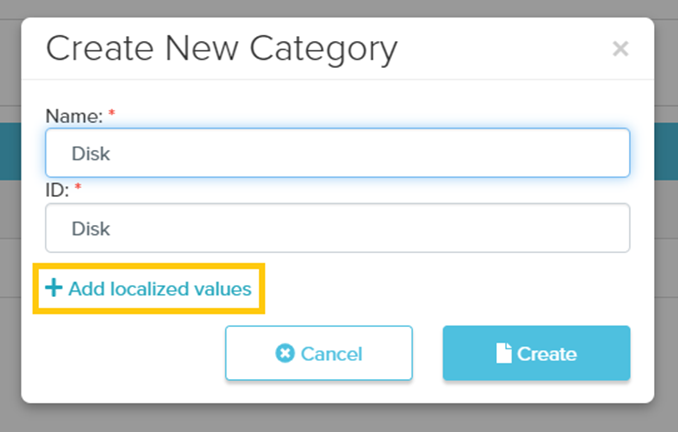
- Click on the Create New Value.
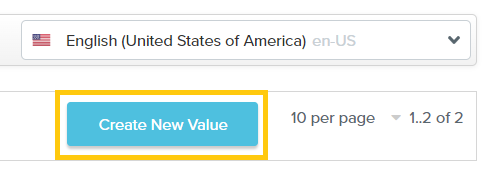
- Enter the Name and ID for the value, and then click on Add localized values.
- A list will show each locale, and will allow you to specify the names for each locale:
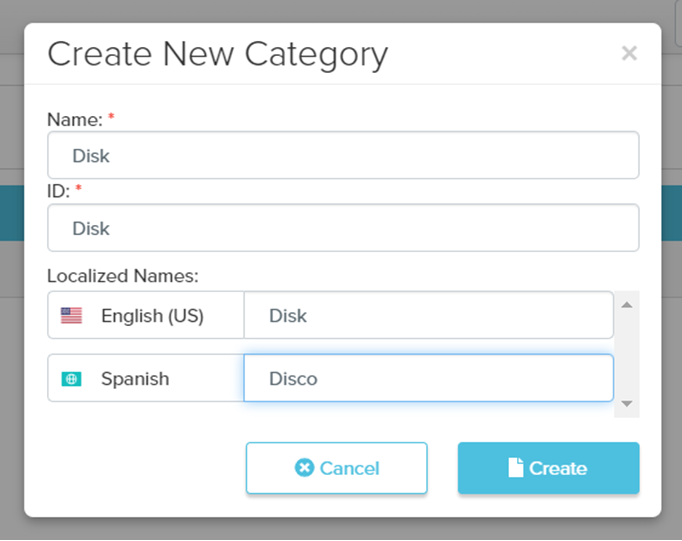
- Click on the Create.
Export Content for Localization
If you have a list of products that you would like to export into a spreadsheet and send for translation, you can do this by following the next steps:
- On the top menu, click on Products > View All.
- Use the search bar or create a filter to select the products that you want to export. Also, use the locale dropdown to filter the locale you want to get the content from.
- Click on Customize View.
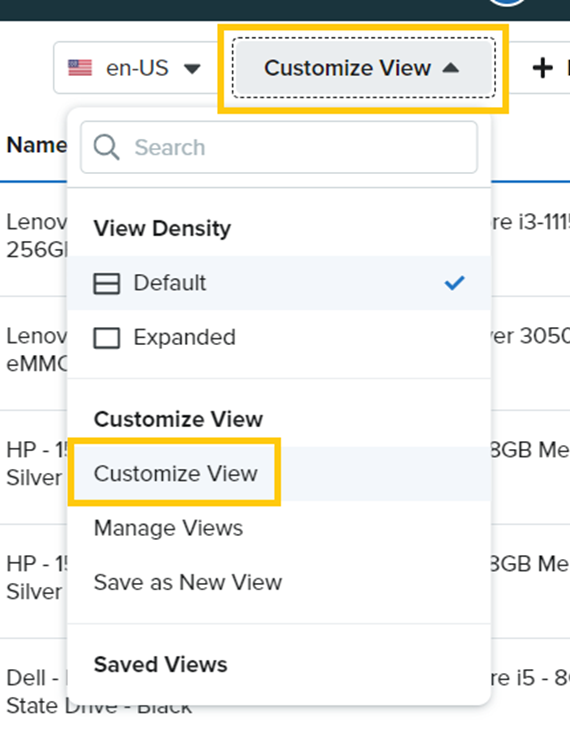
- Add the properties you want to export for translation.
- Click on Actions > Download Selected Columns.
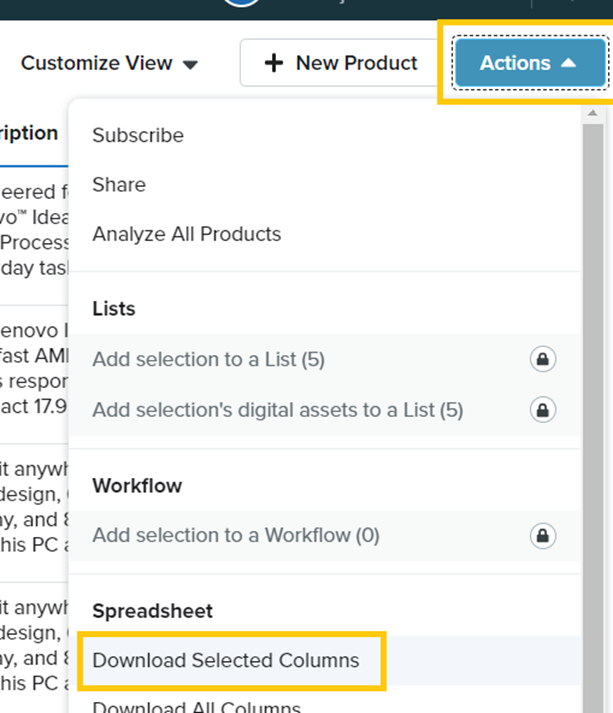
- This will export the content into a spreadsheet and send you an email notification when the export is ready for download.
Import Localized Content
If you have a spreadsheet with the localized properties for your products, you can import its content easily by using the regular import feature from Salsify, which is explained here. Before starting any import, please make sure the spreadsheet has the following format:
- The first column should be the Salsify Product ID.
- Then add a column for each property and locale you are importing the content into. For example, if you are importing the Description and Category fields into Spanish and French (Canada), you should have the following columns:
- Product ID
- Description – es
- Description – fr-CA
- Category – es
- Category – fr-CA
Conclusion
In this blog post, we covered the main aspects to consider when localizing your content within Salsify. If you need help during this process, you can always reach out to Salsify Support.
This platform has a very good set of features for localization and export/import capabilities, making it a great option to consider for marketers that create content for a global audience.