10 FrameMaker Mistakes in Translated Documents: Part 2
This time we focus on the final five items that can increase FrameMaker translation project time and costs in part 2 of our “top ten” list of common mistakes. As with our first blog on this topic, this list assumes that the reader has at least intermediate knowledge of unstructured FrameMaker. Note: GPI will be posting blogs specific to structured FrameMaker and DITA in the near future.
-
SINGLE-LINE RUNNING PAGE HEADERS: many standard templates included with FrameMaker have a predefined, single-line running header that will automatically pick up text from certain paragraphs (e.g. Heading1). Most FrameMaker users will author content with headings that are short enough in English for the repeated text to display on one line in the page header. Problems occur when post-translation text expansion causes Heading1 text to become too long to fit on one line of the page header.
This can become a gnarly problem if it repeats too often in a project. Your translation vendor will have to (a) redesign the target language template to allow multiple lines (which may throw off page breaks) or (b) communicate with you in how to reduce word count in specific headings so the translated version will fit on one line.
SOLUTION: if you are using this template style, stick to short headlines in English, or redesign your template to allow the running page header to break to a second line. -
SIDE HEAD LAYOUT:one of the most popular templates provided with unstructured FrameMaker is “Report, Sidehead”. This template uses FrameMaker’s unique ability to have certain paragraph headings “jump” into the outer, side head margin. The template allows for about 25 to 28 characters to fit in the side head area.
Believe it or not, when source English is translated into Hungarian, Dutch, and a handful of other languages, it is not uncommon for a single word to have more than 25 characters. This leads single words that break a line in the side head region, with one or two characters on the second line. Obviously, this is unacceptable. The only “cure” for this problem is to modify the side head paragraph in the following ways: (a) reduce the point size (b) change the font (c) condense the text or (d) increase the width of the side head margin, which will decrease the margin of body text and change all page breaks.
SOLUTION: if you must use a side head style, you may want to have your translation vendor pre-translate text strings for all of your side head paragraphs to determine maximum word length ahead of time. Then, you can modify your English template to have a side head margin and font point size combination that will work with all languages. -
“PACKED” SINGLE PAGE TABLE IN ENGLISH: many FrameMaker documents have tables that must fit on one page. Over several years of updates, additional information may have been squeezed into the table until it completely fills the page. Point size and table margins may have been reduced (e.g. 7 point type with 3 point cell margins). While this may look acceptable in English, it creates an “impossible” situation in the translated, target language.
Language expansion is magnified in table cells because narrow margins cause more line breaks to occur. With languages like German, Dutch and Russian, language expansion may be quite dramatic. If the source text is already at a very small size and cell margins are not generous, the only option left is to allow the table to break to another page.
SOLUTION: If tables must fit on one page in English and all languages, allow for about 35% expansion of table cell content. Otherwise, redesign your table (and reconsider page breaks) to allow the table to break with repeating table row headers. -
FORCED PAGE BREAKS: it is a common practice with many word processors to insert manual page breaks to achieve attractive space at the bottom of the page, or have a significant paragraph start a new page. If you insist that all target translated languages have page breaks identical to your English source, your translation project will have more billable time during post-translation desktop publishing.
Due to text expansion, if page breaks must be maintained, you may end up with some target language documents that have partial paragraphs displaying at the top of a page, followed by a lot of white space. This problem mainly occurs with customers new to translation who are not familiar with text expansion.
SOLUTION: if you must match page breaks between source English and target languages, maintain a generous margin of white space at the bottom of each page to allow for language expansion. -
TEXT LINES VS. TEXT FRAMES: this problem is less common and occurs most frequently in older, legacy unstructured FrameMaker documents. Many docs that were created for English only contain text lines (created from the drawing tools) for call outs and annotations within anchored frames. Such text is invisible to translation tools, and causes English text strings to appear in the illustrations of translated documents. Text contained in text frames within anchored frames will be visible to the linguist and will be translated.
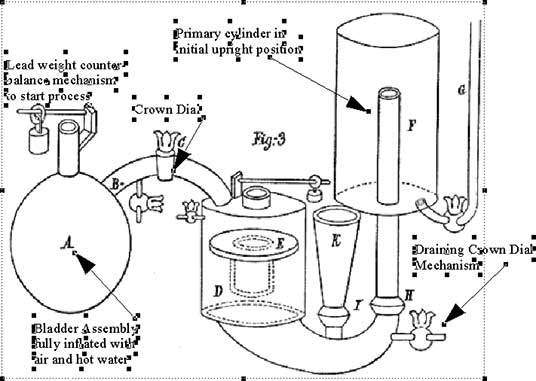
Text lines are very expensive to correct, because there are no tools to locate them, and your translation vendor DTP staff cannot even use copy and paste to replace the text! We have seen many documents that have what appears to be a multi-line paragraph of text in an illustration. On closer examination, the text is revealed to be a series of text lines, stacked over one another. If you select an anchored frame and press Control-a for “select all”, any text lines will have handles around them, as in this screen capture.
SOLUTION: best practices for creating content for translation recommend that you use number indicators in graphics, and then a numbered “keyed” table under the graphic. This eliminates the need to translate text layers in illustrations. If you do have documents that contain text lines in anchored frames, manually replace them all with text frames before submitting your documents to your translation vendor
Summary
If you follow all of these guidelines in preparing your FrameMaker content before submission to translation/localization, you may decrease some portions of your project costs by as much as 33%. Naturally, you can use the money saved with these techniques to move your content into more languages, extending your company’s reach into even more global markets.
You LSP (Language Service Provider) should be able to analyze your FrameMaker documents before translation and provide advice during the Quote phase, before translation and production begins. GPI offers a service that includes DTP consulting and making minor redesigns to your templates to optimize your content for localization and translation. This service will ensure that all of your FrameMaker documents will move through translation and target language publishing with minimal effort.
Our intention is to provide you with practical guidelines that will empower you to submit the cleanest content possible, and substantially reduce translation costs by eliminating unnecessary corrections.
